We all revel at the chances we get to photograph birds, species after species, season after season. We try to take the best possible photos of the birds we encounter under varied circumstances in the field. And sometimes, we are rewarded with great images that show the essence of a bird during the moments we spend in their company. But there’s often an inner wish that the bird was larger in the photo frame, or that there is too much background material that you wish could be eliminated.
Well, you can make both improvements simultaneously to a given photo in one simple task that takes about 20 seconds – and eureka, the bird is larger in the frame and extraneous sky, water, plants, or rocks are gone – they are cropped out of the photo frame, and the bird is enlarged in the process. Now that’s not news to most photographers, but it’s important to revisit even the simplest actions sometimes to keep in mind how good photos can be improved to make them great photos.
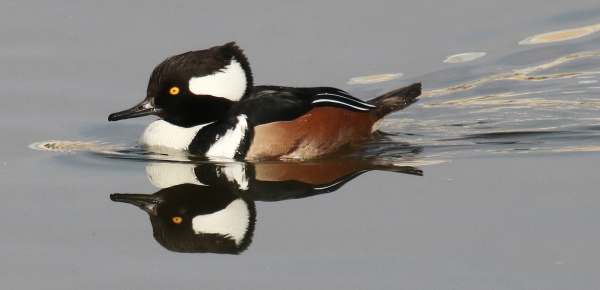
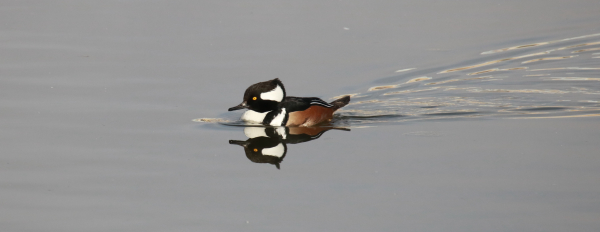
By cropping out extraneous water in the original photo, the Hooded Merganser and its swim wake shows action and positions the bird off-center (photo info: 600mm zoom, f-7 aperture, 1/1600 shutter speed, ISO 400).
We emphasize taking photographs, and that’s often an exciting activity in the moment, part of the attraction of photographing birds. And when we review the photos we’ve taken on a computer, laptop, or tablet we can assess each image and pick out the higher quality images. If you find you have taken a photo that is perfect, more power too you – congratulations! But I find that most photos I take can use a little improvement in the form of cropping.
Some computers have a photo editing option included as part of a Microsoft or Apple program, and that’s a simple option to use for cropping any photos. I use an economical photo editing software program to crop photos – PaintShop Pro by Corel. It’s easy to use, it’s free of future payments after a $50 purchase, and this software has many advanced options some artists and designers may utilize, along with some photographers interested in advanced photo manipulations. Personally, I try to do as little photo editing to photos I take as possible, and always try to limit photo editing to the simple cropping of photos.
The center third of the original photo of the drake Hooded Merganser showed great promise, which was realized after a simple crop (above photo).
A Cropping Frame
When cropping a photo, you are usually working with a rectangular-shaped frame that you use to design the outline of your photos. By eliminating extraneous background material you will enlarge the bird or birds in the selected photo, but there’s another nice option you can take advantage of when cropping. You can alter the bird’s position in the cropped image by positioning the cropping frame so the bird is in the center of the frame, or to one side or the other.
This is when the creative process becomes most interesting, and most impressive during the simple cropping process. In some cases it can be most effective to center a bird in a photo. But personally, I like to position a bird off-center, to one side, between the center and left or right edge of the image. Let your eyes and sense of creativity show you where the bird’s position in the frame looks best. If the bird is facing right, I tend to position it on the left side of the frame, so it looks into the area to its right. If the bird is flying to the left, I like to position the bird on the right side of the photo, showing more of the area it is flying into on the left side of the image.
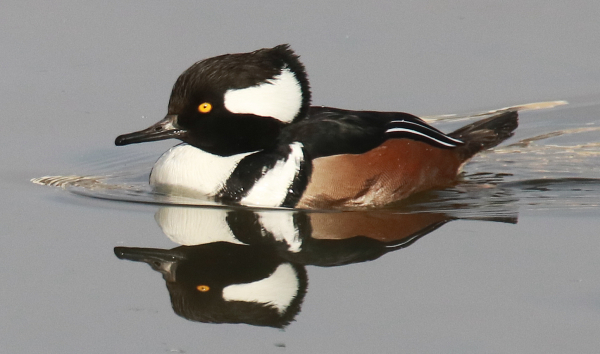
A second crop provides a tighter (closer) view that reveals more character in the Hooded Merganser while preserving its reflection in the mirror-like calm water.
When I position the bird on one side in the photo frame, I’m actually using the “rule of thirds,” a technique familiar to many artists and designers. Photographers also use this technique for photo framing and design, although it’s just a guide to be aware of when composing photos. Some cropping frames provide an option to use a frame that is divided by the 2 vertical lines and 2 horizonal lines used in the rule of thirds. Ultimately, though, you will find what looks best to you.
Also, keep in mind that there is no single way to crop a certain photo. While always preserving the original photograph. You can make copies of the original photo and crop one as you see fit, perhaps with a bird feeding at one side of a rectangular photo frame; then crop another copy by reducing the size of the cropping frame a bit more, thereby enlarging the bird’s image some more and centering the bird within a square cropping frame. Sometimes you may also wish to show more of the surrounding landscape, plants, or sky in by using a larger cropping frame – you get the idea.
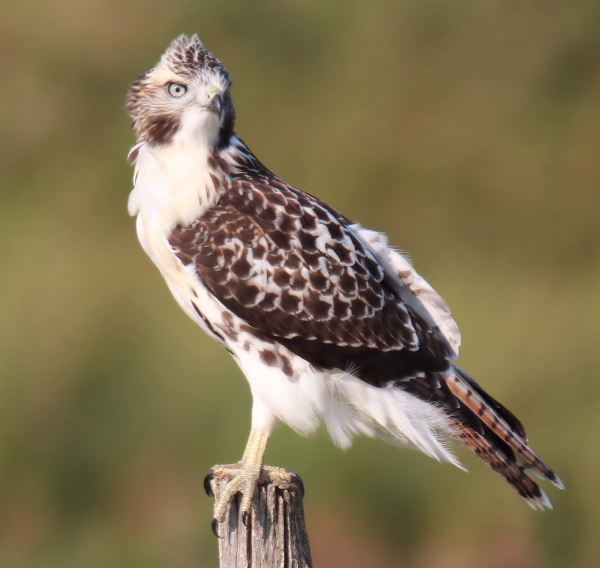
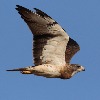
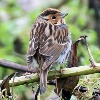
Already cropped into a square photo frame, this is the best example of how to crop this image of a fledgling Red-tailed Hawk. But it was worthwhile to give it a second creative look and zero in on the wind-blown-crest on its head for a second crop (see below).
Keep It Sharp
One negative effect of cropping is that there are limits to how much you can crop a given bird photo. When we crop more and more of the surrounding photo material out of an image, effectively enlarging the bird’s image more and more, we must always be aware of the quality and sharpness of the initial photo and any limits it may have as we enlarge it. While cropping, monitor the quality of the enlarged image. Does it become a little fuzzy along the edges of the bird’s plumage, beak, or eyes? Can you see a graininess in the formerly uniformly colored sky?
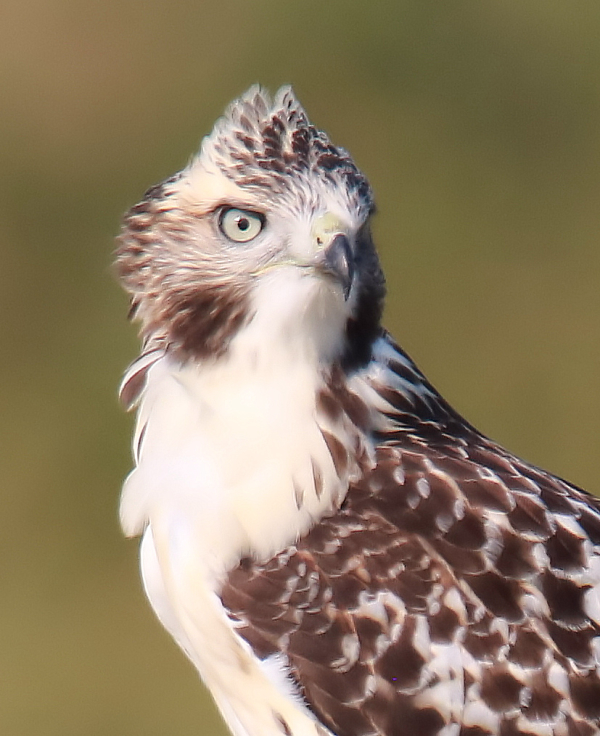
A second crop of the fledgling Red-tail photo emphasizes the bird’s face and crest-like feathers elevated by the wind. Not all photos are sharp enough to crop to this extent, but it’s worth testing the idea (photo info: 600mm zoom lens, f-6 aperture, 1/1000 shutter speed, ISO 400).
|
If that is the case, it indicates you have cropped the image too much, enlarged the bird’s image too much. When you see this happen during the cropping process, it shows you where the limits of the cropping process lie, which is important if it becomes obvious during cropping. In response, I always increase the size of the frame until the image produced shows no grain, and shows sharp edges on perimeter feathers in the outline of the bird, and a sharp beak and eyes. After all, while we may want to have a larger image of a bird in a photo, there are often limits to how large we can increase the bird’s size during the cropping process. In extreme cases, cropping doesn’t work for some photos.
Overall, the quality of the initial image, and ultimately the cropped photo, will have a lot to do with the quality of the telephoto lens or zoom lens we are using, along with the optimum quality of photos our camera is capable of taking. That can be a personal choice, often an economic choice, but that’s a whole ’nuther topic of discussion.
I’m frequently impressed at how a simple photo crop can make such a big difference in a given photograph, and overall, the cropping process is quick and simple, and will provide surprising improvements to many photographs you’ve taken. It’s the next step after you take photographs, review them, and pick out favorites you wish to improve via simply cropping the image. Take a second look at some of your photos with cropping in mind, and enjoy the photo editing process.
Article and photographs by Paul Konrad
Share your bird photos and birding experiences at editorstbw2@gmail.com