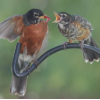
One of the most exciting things that can happen at a feeding station is for birds that visit your feeders during the nesting period to bring their fledglings to your feeders and surrounding tree branches. In addition to the chance to view the young birds at close quarters during this important developmental stage when they learn to fly and learn how to survive beyond the nest, it's great to watch the interactions between fledglings and adults, and other birds. Most songbird fledglings rely on the adults to feed them and protect them, while the young birds watch and interact with adults and other birds at a feeding station, and beyond.
Birding Festivals are truly celebrations of birds and birding, shared by participants that include every age and every level of interest in birds. With many birding festivals providing guided hikes and field trips with local birding guides, they may also offer a variety of presentations, speakers, and workshops. There are children's activities and family fun too, and best of all, you have the chance to meet and enjoy spending time with others who share your enthusiasm for birds and birding! At larger birding festivals you may also be able to shop for birding optics, field gear, books, feeders, and more from vendors who can answer your questions on hand.
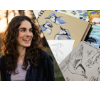
Join Liz Clayton Fuller for her free live bird sketching event that's sure to be a blast! Sketch moving birds along with Liz as we watch the stars of the Cornell Lab FeederWatch Cam – or just sit back and enjoy watching Liz create bird art live online. Liz will talk about her work, answer audience questions, and explain her techniques for sketching birds from live encounters. Whether you are interested in becoming a better sketcher, curious about the artistic process, or an artist yourself, you are sure to have a lot of fun if you participate next Monday, July 20, at 2:00pm Eastern Daylight Time, 11:00am Pacific.
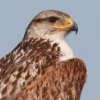
With some extra time to go birding and travel to neighboring states over the America 250 holiday break, I have a wealth of information and photographs to share with you! Rather than recounting the highlights in chronological order, I'm going to start with an exciting outing I especially enjoyed last weekend, when I checked on the most productive duckling producing marsh in the area on my way to monitor the now-fledging Ferruginous Hawks – 3 of them, although I only saw 2 fledglings and both adults in their nesting territory Saturday evening.
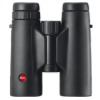
Lightweight and comfortably compact in form, Leica Trinovid 8x42 HD Binoculars provide exceptionally bright images with ultra-sharp resolution, high contrast views, and natural color fidelity that provide an inspiring birding experience every time you use them. The Trinovids provide phase-corrected prisms with fully multi-coated HD optics to boost light transmission through the lenses to produce high-contrast images that show the true colors of the birds you see. Birding with these Leica Binoculars guarantees a steady grip and intuitive handling with quick, precise focusing.
Cool, lightweight sun- and bug-busting clothing from L.L. Bean will protect you from sunburn and repel biting insects. Summer birding can be curbed by the likes of mosquitos, biting flies, and other bugs, but be proactive by wearing bug-busting clothing that repels biting insects with a proprietary formula that's safe, effective, odorless, and registered with the EPA. The insect-beating formula will last up to 70 wash cycles, and it will get you back into your regular birding zones. L.L. Bean also has an excellent selection of women's and men's sun-protection apparel made of SunSmart fabric that blocks 97 percent of the sun's UV rays.
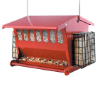
Available now from BestNest, the popular Heritage Farms Seeds & More Double-Sided Bird Feeder is perfect for any feeding station. This feeder is perfect for attracting the best variety of birds with feeding perches of this "big red" feeder, along with 2 suet cages located on the ends of the feeder so you can nourish an additional variety of birds. With feeding stations on every side of this impressive feeder, the seed section provides a 10-quart capacity and the clear plastic windows show the seed level at all times.
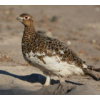
The big excitement for July is the documentation of the First North American Record Pearl Kite in a desert area of California, far from its normal range that is centered in Brazil but extends as far north as Nicaragua! Of course, this Pearl Kite also establishes a First State Record as did a Willow Ptarmigan photographed in Pennsylvania, and a First Territorial Record Sage Thrasher was documented in the northern Yukon. There are many other exciting rare birds to report, with standouts including a Second State Record Red-footed Booby in Maryland and a Third State Record Baikal Teal in Hawaii.
Planning your birding sessions during prime evening or morning sunlight ensures the birds you encounter provide the best chances for quality photo opportunities (550mm zoom lens, f-8 aperture, 1/2500 or 2000 shutter speed, 800 ISO).
We have all photographed a bird as it perched on a branch, fencepost, or another location; usually it is a quick photo and the bird moves on – or we do. But recently I was reminded that when on territory, some birds have a favorite perch or perches they prefer to use on the edge or in the midst of their summer territory. Regularly used perches are usually associated with singing perch, a nest site, or a hunting location, so I’m always very careful about not pressing a bird too much to get into photo position, but while photographing a Burrowing Owl recently, I found that the male used the same perch each time I saw him and thought I might be able to get some action photos as he hunted flying insects.
I kept my distance at first, but during my third visit in 2 weeks I noticed the small owl seemed to have complete trust in my advance and positioning. And when the female suddenly appeared on the very next fencepost, she seemed to be immediately relaxed with my mobile blind (white car) parked nearby with the sun behind it. I concentrated on the male, considering I didn’t see the female hunt, and each time the male caught an insect, it took the big bug to the location of the nesting burrow – then returned to its fencepost perch. Using my Tamron 150-to-600mm zoom lens, I zoomed back a bit to increase the size of the area surrounding the metal post in the photo frame to try to keep the small owl’s wings within the frame as it flew to the post. As I waited for the owl’s return, I pre-focused on the fence post and used a medium aperture of f-8 with the hope of keeping the entire owl and its wing and tail feathers in focus.
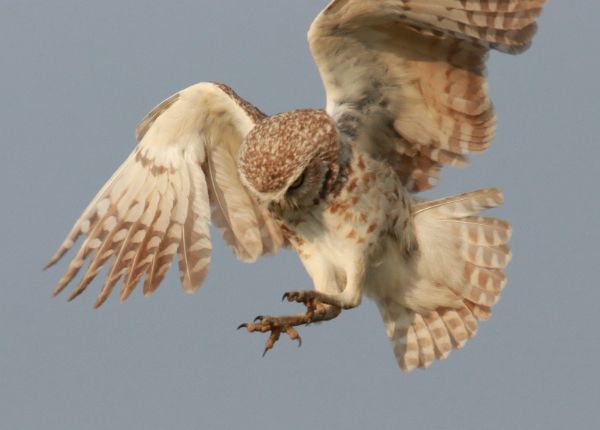
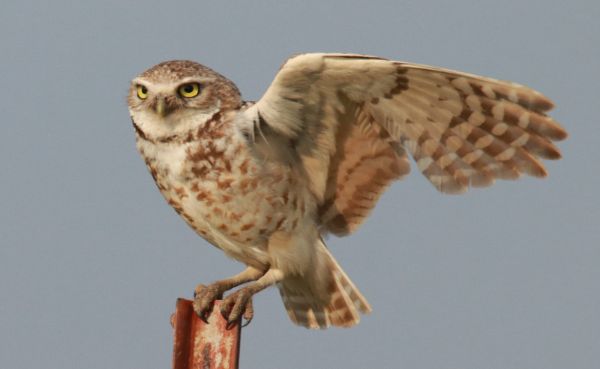
Surprised that the owl dropped in from above rather than its usual approach from the ground, the owl’s upper wing was just beyond the photo frame as I depressed the shutter button. Even so, it doesn't detract from the image too much because your eyes are drawn to its bared talons (550mm zoom lens, f-8 aperture, 1/2000 shutter speed, 800 ISO).
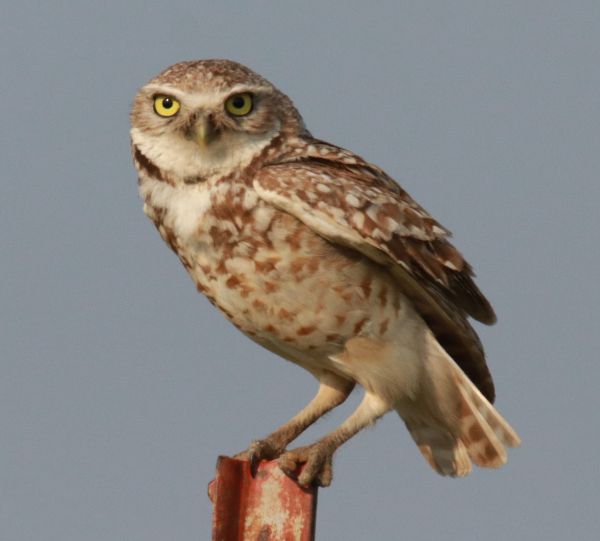
I couldn’t see the owl coming until the last second as it approached its favored perch, so there was a level of anticipation and keeping alert until the quick movement of the owl precluded its landing. I have the camera’s Al Servo setting set at “continuous”, so as soon as I press the shutter button and keep it depressed, my camera takes 5 photographs per second, providing an exciting fast-action series of photographs as the owl landed on the perch. In the series of photos that illustrates this article, I was surprised that the owl dropped in from above rather than its usual approach from the ground. That resulted in part of the owl’s left wing being just beyond the photo frame, but the fact that it bared its talons as it reduced its speed with its broad wings and tail spread to brake its approach helped to focus attention on the owl’s feet. And all the other photographs were well-centered in the camera frame, from landing to balancing to folding its flight feathers. As it checked its surroundings and searched for the next bug or vole, I took a couple more photos to show its more relaxed positioning.
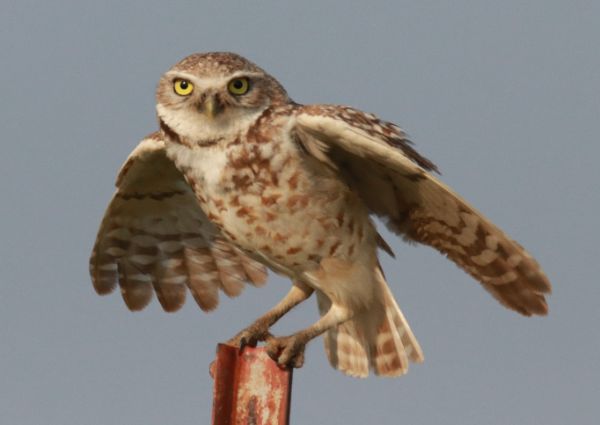
Exciting spread-winged images are the ultimate reward for a successful combination of photo factors as the owl lands and balances on the perch (550mm zoom lens, f-8 aperture, 1/2000 shutter speed, 800 ISO).
You never know the results of such an interaction between you, the camera, and the owl until you have a chance to review the photos on the big screen of a laptop or desktop computer, but I saw the photo series had strong merit when I quickly checked the images on the small LCD screen on the back of my camera. I had a chance to take a second series too, but the first series, taken only a few minutes after my arrival, was pretty hard to beat in retrospect. In addition, the lighting was as good as I could hope for – bright but lightly subdued as the sun was at a lower elevation toward the horizon. The positioning of the sun behind me also reduced the chance of shadows from beneath or at one side. Voila!
As it was landing and balancing on the uneven metal post, the small owl's attention turned to my camera lens as it folded its cupped wings. The ample shutter speed provided sharp action photographs in a uniformly colored background (550mm zoom lens, f-8 aperture, 1/2500 shutter speed, 800 ISO).
Of course, any bird can be the star of the show at a frequented perch site. The show being a series of photographs, of a bird landing, singing or calling, stretching, flapping its wings, or even preening. Often it comes down to finding the right bird – one that permits you to melt into nature so the bird acts as if you are not there, or it embraces you as part of its realm. Sometimes a bird must get familiar with you, and I played it safe with the male over time, getting a little closer each time I saw it; while the female was never concerned from the first moments forward. I always keep the bird in mind and stop or back off if I get the impression the bird isn’t comfortable – the birds always comes first, especially during the nesting season, when they are on territory, feeding mates and nestlings, hatchlings, or fledglings. Enjoy your summer photo sessions, and embrace photo ops when they are presented by feathered ambassadors. Thank you Ambassador Burrowing Owl.