
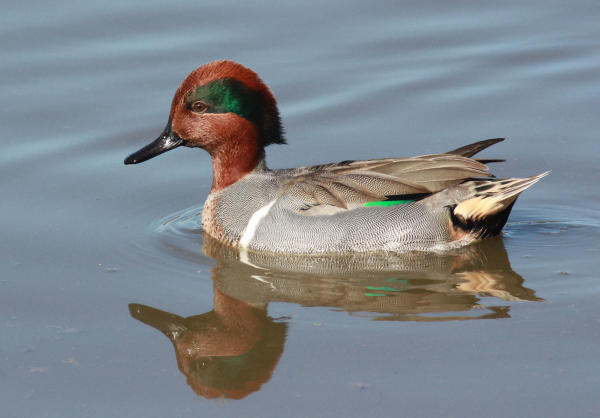
 Cropping of the original photograph provides increased magnification and a closer focus on the drake Green-winged Teal. 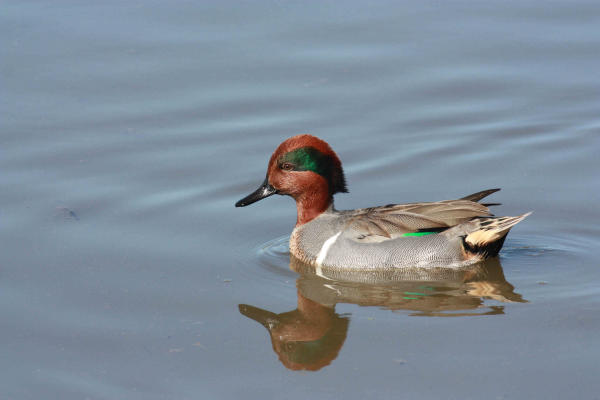 The original teal photo required cropping to make it the best image possible.
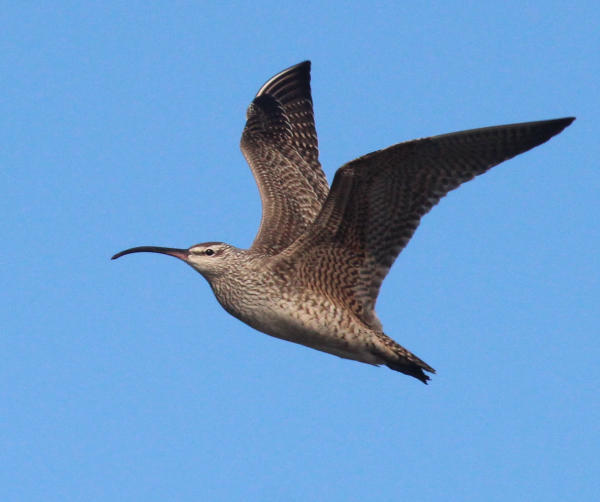 Both of these Whimbrel photos are well composed and have good qualities, but this photo was cropped to create a second larger image of a single Whimbrel. 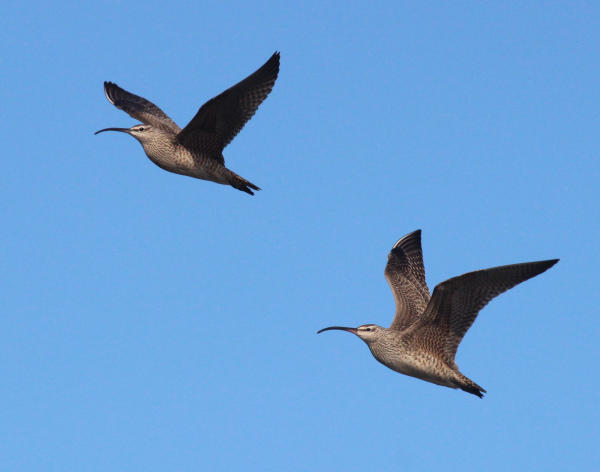 The original photo of two Whimbrels in flight is also a fine image.
|
Recently, I’ve been surprised when I noticed that many good photographers aren’t doing any photo editing. Some simple editing techniques can do much to improve the composition and even the magnification of many photographs. The simplest and best way to improve any photo is to crop it. That is, you essentially cut the sides, top and bottom of the image to reduce the extraneous portions of the photograph to better highlight the subject of the photo.
How much you crop from a photo will be dictated by personal insights, design elements, the quality of the image and your own creative juices. I enjoy the photo editing process and my photos always benefit from the simple editing process of cropping.
Using today’s digital photo systems, our computers are now our modern darkrooms, and we edit photos in photo-editing computer programs. If you already have a photo-editing program, great; if not, you can pick one of the many free cropping programs available on the internet – just use the search words ‘cropping photos’ in Google or your preferred search engine to see a list.
First, you need to insert the photo card from your camera into your computer or a card reader inserted into the computer. Then open the photo you wish to crop in your photo-editing program. Some editing programs are complicated and expensive; others are much less expensive, or free, and relatively simple to use. Next, pick the cropping tool.
Most cropping tools are rectangles that can be stretched right, left, up and down to position any way over your photograph. If you like how the cropping border looks within your photo, click the crop button and you’re done – it’s that easy. You can always second-guess and try another move, or reverse the process and go back to your original photo and start again. The process is a quick, fun, creative process and your photos will be improved by this simple effort – often in big ways.
Of course, when you begin cropping a photo, you want to zero in on the bird, but not necessarily keeping it in the center. Center is fine, but a better design option is to position your crop so the bird is positioned to one side or the other, giving a flying bird a little more space in front of the bird to “fly into,” giving a perched a space to look into, or giving a standing bird space to walk into.
Part of the cropping process is to zero in on the bird or birds and, in so doing, you are essentially magnifying the subject(s). But try not to overdo it. There’s a fine line between enlarging an image and over-enlarging the subject. Check the eyes for sharpness, as well as the outline of the bird – it’s head, bill, wings – to make sure they are sharp. If they have lost some sharpness due to the cropping/magnification process, reduce the size of the crop a bit and check the sharpness again; better?
As with any creative endeavor, there is no right or wrong; it’s just a matter of whether you like it. If it looks better and gives you a greater sense of satisfaction, you did all the right things. Now, on to the next photo.
Article and photos by Paul Konrad
Share your favorite or most recent photos at editorsbtw2@gamil.com