
When it comes to editing photographs, I usually limit any changes to the original photo to cropping extraneous background portions of the image, which also serves to increase the size of the bird in the frame. Beyond that, it’s best to keep things as natural as possible, although I occasionally try to improve an image by brightening slightly shaded photos or trying to sharpen a less than sharp image with photo editing software. But every once in a while, I take a photo in which the bird is quite nice – sharp and showing natural colors in good light – but it is surrounded by a really unsightly background. Darn, I think, it would sure be nice to cut that background out and replace it with a pleasing one.
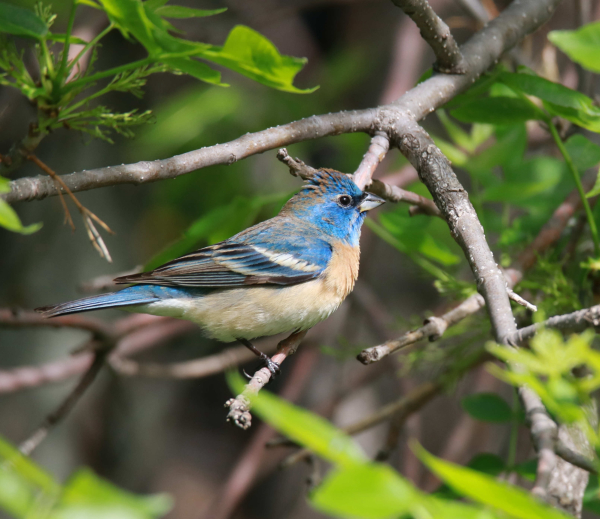
Almost always, that level of editing never happens; partly because I haven’t had very good luck with previous attempts at improving or replacing the background in a bird photo. The photo editing process required is not easy and it’s quite time consuming. My latest interest in devoting some time to improving the background of a bird photo came after taking a promising photo of a rare bird in this area – one I’ve not seen in my neighborhood of Dakota before. While in the heat of photographing migrating warblers in late May, a male Lazuli Bunting, a western species, popped into the open on the edge of thick vegetation. I took a few rapid photos of the bird, which I expected to be of documentary quality at best, but the first image turned out to be pretty good – the best of the bird, but it was not a good photo considering the distracting and disappointing background setting.
After inspecting the photo under magnification on my laptop, the bird and all its physical attributes were sharp with natural colors, and I vowed that this was my next project photo to replace the unsightly gray background. With that in mind, I hoped my photo editing software’s background changing options had improved since 2013 when I last devoted time to this kind of endeavor. In retrospect, it was time consuming, taking about 4 hours of computer time, as well as a couple more hours of studying “how-to” manuals and online tutorials that are never very well written.
That said, I’m not going to describe how I did the edit, or how you can do a similar one. That’s not the point of this article, which is more a matter of wanting to share what was, what is, and what can be, in the form of an ultra-edited bird photo. I wanted to try a couple editing options, primarily using different backgrounds, one an out of focus green vegetation background, and one showing the green vegetation that the Lazuli Bunting hopped out of and into the open gray background dominated by branches.
Get Out the Eraser
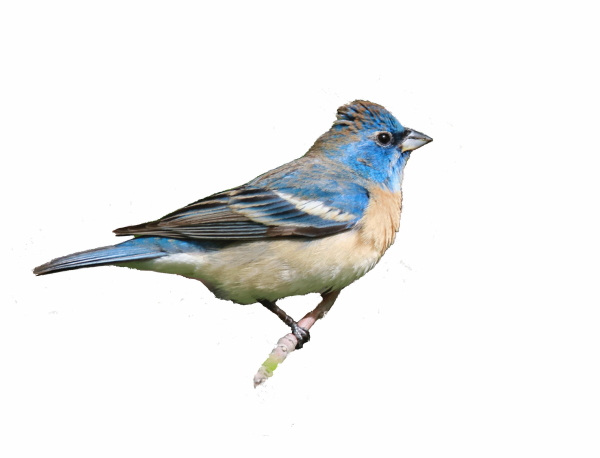
There are 2 major steps to replacing the background of a photo. First, you remove the background using one or more of the photo editing tools provided on your software screen (I use Paintshop Pro photo editing software). I decided to use the “Background Eraser Tool,” a pretty good bet as indicated by the name of the tool. It takes a steady hand as you digitally “erase” the background from around the bird. You want to do it very carefully so there is not a distinct outline around the bird, and so you don’t cut even small parts of feathers. You also want to be sure the outline of the bird isn’t unrealistically straight, but shows detail in feather edges and the true outline of the beak, back, and tail.
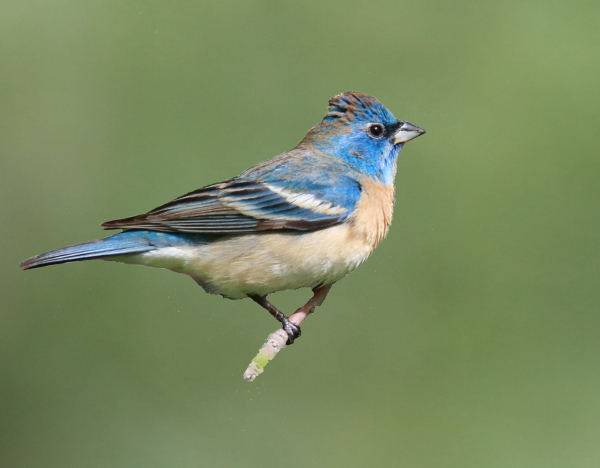
Next, you need to pick the background you will use to replace the one you just erased. This can be a second photo, a part of a second photo, or a digitally “painted” background that you can compose using colors and painting tools provided in the software. For me, it took some time to go through photos and select one that had a relatively pleasing background setting. And I took a half-dozen out of focus photos and selected the one I thought might work best to use a blurred background, as if you used an f4 aperture to take the photo.
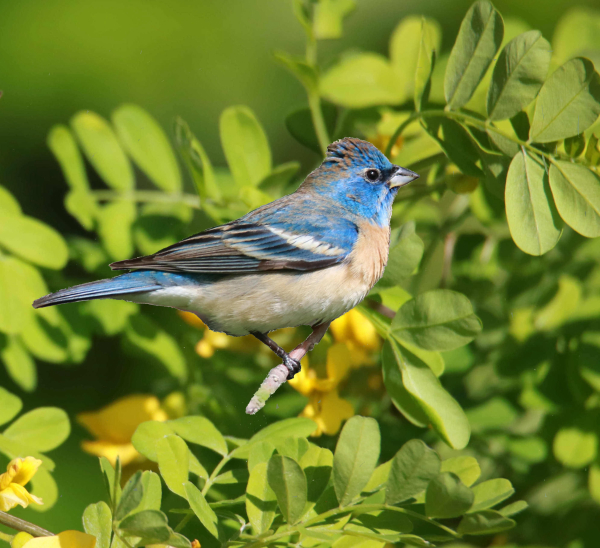
Erasing the background of the original photo was relatively easy and took about an hour, but trying to combine the bird image with the background image was a long haul. Call it a learning curve, or a trial of errors, or just not having the experience or instruction that would have made this effort much more streamlined. I’d say I could definitely cut the time it took to do the edit by half, which is considerable, knowing what I know now. In the end though, I’m pretty happy with the end result using the vegetation background. The out-of-focus background image is OK, but I can definitely improve on it with another hour of patience by cutting out a branch from another photo and adding it to the blurred background.
To illustrate the super-editing process, I provide 4 photos here: 1) the original photo, 2) the Lazuli Bunting with the background “erased,” 3) the best image overall with the bunting cutout positioned within the background of natural plants, and 4) the photo of the Lazuli Bunting with the out of focus background. As a matter of fact, the best image may have been possible if the bunting had turned right a couple feet before continuing forward to the location where I first saw it and took the initial photo.
If you are interested in learning more about some of the options and details of how to replace the background of a photograph using Paintshop Pro photo editing software, you can refer to the PDF tutorial that covers all aspects of simple and ultra-creative photo editing. See the PDF at http://help.corel.com/paintshop-pro/v19/main/en/user-guide/paintshop-pro-x9.pdf Relative to changing the background of a photo, see the sections about Erasing Image Areas using the Eraser Tool (page 256), Combining Photos (pages 298 and 531), and those topics will cover a small part of the tip of the iceberg; ha-ha. Actually, checking out the PDF may open up some exciting creative ideas for you, and creativity is one of the most exciting parts of photo editing – and life – so take a look at the many ideas and techniques.
By the way, Paintshop Pro is an adequate and economical photo editing program, especially for the type of edits I usually use it for – to crop, brighten, or sharpen a few selected photos. And if you are interested in doing more, the more power to you. I intend to do a little more similar background or element replacement work soon, but it will hafta be on a rainy or snowy day when photographing birds is outta the question.
In the meantime, I had a great photo expedition this evening (Monday), and I hope you all find interesting birds to photograph in coming days and weeks, which are among the most interesting of our birding year. After all, it’s the first week of summer 2021, and with new birds nesting, hatching, fledging, and visiting our feeders and water features, give your camera a good workout, and appreciate every bird that you focus your lens on!
Article and photographs by Paul Konrad
Share your bird photos and birding experiences at editorstbw2@gmail.com