Shutter speed is an important aspect of bird photography, especially for action photos, but there is some give and take among a number of camera settings that provide fast shutter speed. The most obvious balancing act is the one between shutter speed and aperture. Realistically, the interactions between these 2 camera settings dominate bird photography, and actually, any kind of photography. Starting with the basic question of: How fast should the shutter speed be when photographing birds? – let’s get started.
To photograph a bird that is perched or standing fairly motionless, a 1/400 of a second shutter speed is usually adequate when using a zoom or telephoto lens, especially if you are bracing your lens and holding your breath, which should be standard photo behavior for you. Realistically, you can probably get a sharp photo of a motionless bird using 1/200 shutter speed if necessary under given conditions.
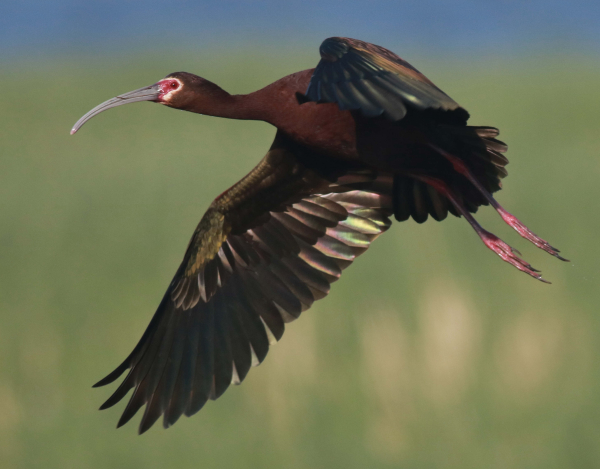
To stop action it’s best to try to use the fastest shutter speed possible, at least 1/1000 of a second and under good sunlight conditions I often can use 1/1600 to 1/2500, which will stop all or most motion of a flying bird. But we all know it’s not so simple as addressing shutter speed alone. Shutter speed is tied directly to aperture, so let’s look into aperture in a simple manner; then we’ll explore how aperture interacts with shutter speed.
Overall, aperture can be used to create better photographs of birds in the field and in your yard or neighborhood. Aperture dictates the area that is in focus – the depth of field, or area in focus. In some cases you want a broad depth of field for your image to show all the details of the bird plus background details, while in other cases you will want to limit the area in focus to a narrow band of focus that will provide a sharp image of the birds but blur the details of an unattractive background.
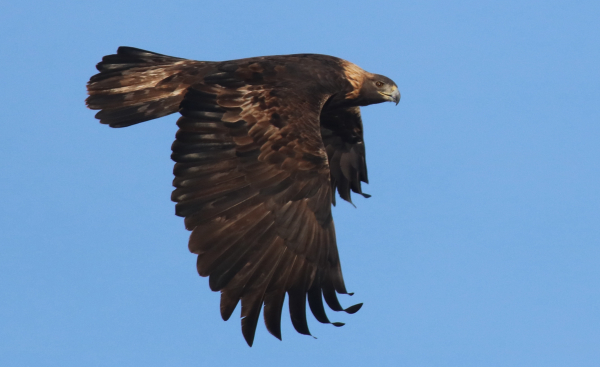
Aperture is gauged using f-stops that may range from f-2 to f-32, although the range of f-stops will differ depending on the lens you are using. Simply put, a small f-number provides a narrow area in focus; a larger f-number provides a broader area in focus. For example, an f-4 aperture provides a much narrower area in focus than an f-14 aperture setting; an f-8 has a wider area in focus than an f-5.
When using a telephoto lens, say a 400mm telephoto, your f-stop range will be somewhat limited when photographing birds. Using my zoom lens, I find myself using apertures between f-5 and f-10 almost exclusively, and most often I use an f-8 setting for general settings and I usually pre-set my camera at f-8 to be ready for any photo opportunity I encounter while birding. An f-8 aperture provides a good workable area in focus for all-around bird photography, including photos of large birds in flight.
To Blur, or Not to Blur
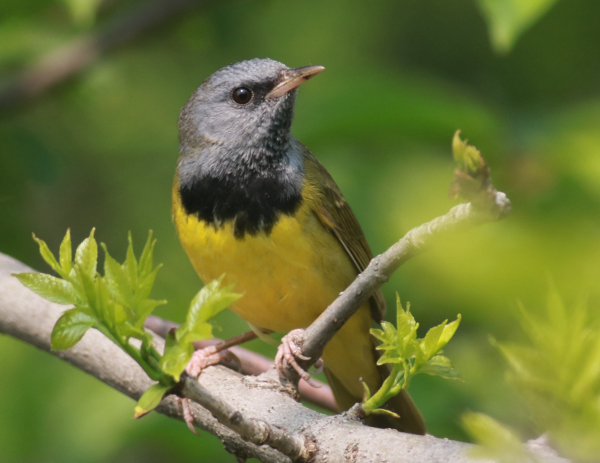
There are times you will want to emphasize a narrow area in focus, say by using an f4 aperture. Sometimes, the background can be distracting, even unattractive, so rather than trying to tie the background into a photo you can use a narrow area of focus to blur the background out of focus to a fairly monotone color behind a bird. A woodland edge of green leaves is turned into a pleasing fairly uniformly colored green background; a dry prairie landscape becomes a fairly uniform tan background. This technique not only eliminates distracting background element, but it also emphasizes the bird, and helps to make the bird “pop” out of the background.
There is a catch to this method though; while blurring the background with an f4 or f5 aperture is especially affective if the landscape or plants are several feet or more behind the bird’s position, when plants or other items are closer to the bird, they may not blur as well. In some cases you may need to take a couple photos and, if possible, check a resulting photo in your camera’s LCD screen to see how the image looks, then adjust to a better setting.
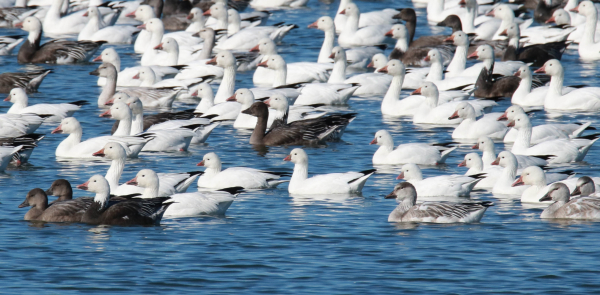
In short, by using an f5 aperture, your photo will blur the background to provide a fairly monotone coloration. Conversely, if you use an f10 aperture, your photo will record a background that will show some level of detail in the grasses, branches, leaves, or other landscape elements, which can be affective in certain contexts – it’s up to you as you put some thinking into the creative process of photography.
Speed Balancing
Aperture doesn’t work independently though. As noted above, aperture is linked to shutter speed, so for each aperture adjustment you make, your shutter speed setting will change. Therefore, you must prioritize your aperture setting, or your shutter speed setting, to get the kind of photo you prefer. Often you don’t have a lot of time to make adjustments to your camera settings, but I never use an automatic setting – and I want to strongly encourage you not to set your camera mode on Auto.
Instead, for superior results use the aperture-priority setting, usually denoted as the Av setting on your Mode dial. Then you set your aperture and the camera provides the corresponding shutter speed. As you change the aperture from f-5 to f-8, your shutter speed will be reduced (slower). Conversely, if you change your aperture from f8 to f6, your shutter speed will be faster.
By using the Av setting, you gain a bit of automatic input from your camera, but you are able to judge all elements of the photo to adjust the camera settings to work best to achieve your intended photo results. While in the Av mode, under good sunlight conditions I set my aperture at f-8 and the camera automatically provides the corresponding shutter speed under the existing sunlight conditions. At f-8, I usually get an appropriately fast shutter speed between 1/1000 of a second and 1/2500, which will stop all or most motion in a flying bird. If fading sunlight affects your photo options, you can dial the aperture to f-7 or f-6 to create faster shutter speeds, keeping in mind that the area in focus narrows – and that’s the balancing act at work again.
Setting 3
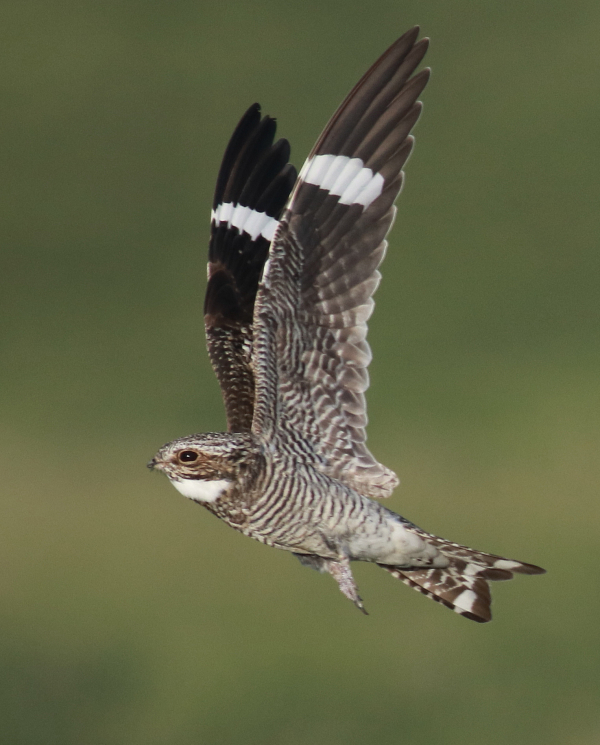
Balancing a fast shutter speed to stop the action of the wing beat of a Common Nighthawk with an aperture that provided a narrow area in focus blurred the background to highlight the bird’s long wings and details of its plumage (photo info: 400mm telephoto, aperture f-6, shutter speed 1/2000, ISO 400).
|
For the record, there is a third setting to keep in mind in addition to shutter speed and aperture, the ISO, which reflects the camera’s sensitivity to ambient light conditions. This is a basic setting that I keep at a standard 400, which provides a perfect range of light under good sunlight conditions. I never change this setting, except if the sun goes behind a cloud and the shutter speed is reduced significantly by the shaded sunlight, I increase the ISO to 800; then change it back as the cloud passes. I find that any setting above ISO 800 tends to produce grainy photos. Using an ISO of 200 or 100 will provide better quality images, but these settings tend to limit your shutter speed and/or aperture a bit, so ISO 400 has been the best bet for me for digital bird photography with the sun at my back.
Adapting & Experimenting
Sometimes, especially when a bird offers you an opportunity to photograph it for an extended period, you can make aperture and shutter speed adjustments, and even try a couple different settings to test what works best under the conditions at hand. For example, try creating a portrait-like background using an f-5, then change to an f-11 aperture for an “au natural” background. Over time, using your experience, you may develop your own preferences and appreciate what works best for you under different conditions and in varied habitats.
Especially when using a narrow focus setting, be sure to focus on an eye of the bird. That way, if not all of the bird falls within the in-focus area, the eye or eyes are sure to be in focus. If the tail shows a little blur, that’s acceptable, but we always want a sharp eye in our photos.
By referring to the photos that illustrate this article, you will get a better appreciation for how to use the aperture-priority setting in the best possible ways to get the best photo results, including an optimum shutter speed. Overall, it sometimes may seem complicated, but it’s really just balancing 2 factors – the aperture and shutter speed – and knowing what any changes you make to these settings can do to improve the photos you take during a given birding opportunity. Beyond that, photograph on sunny mornings and/or evenings, position yourself so your shadow points at your subject, and enjoy all your photo experiences as fall progresses.
Article and photographs by Paul Konrad
Share your bird photos and birding experiences at editorstbw2@gmail.com