
Why do we take photos of birds? What makes them so attractive? How can we record that attractiveness on digital photographs? How can we use those photos? These are all fair questions, somewhat philosophical, but they open an interesting line of thoughts. Perhaps we can lend some insights and explore some bird photography philosophies by starting with a single species of bird. Not just any species, let’s go with a commonly encountered hawk, a highly variable hawk species, a bird every birder and most non-birders have heard of – the Red-tailed Hawk. Okay, but that’s one photo of one bird, right?
Actually, Red-tailed Hawks are a great species to study in depth to appreciate age-specific differences and their varied plumages – some regional, like the Harlan’s Red-tails and Krider’s Red-tails; others more subtle in their differences. And by using photographs we take in the field, our efforts to learn more about Red-tails, identify them easier while perched or in flight, we not only get to know the species better, but we also become better photographers in the process.
Among the largest hawks, Red-tails lend themselves to providing impressive photographs as they sail on broad wide-spread wings and a flared tail, ever strong in their varied flight positions. And with their characteristic hooked beak and piercing eyes, they provide intense portraits. Red-tails are the most common hawks and they are the most widespread among our North American hawks, so they are likely to be the raptors you most commonly encounter while birding. They also tend to stand out among their surroundings, often perching in the open on a fairly exposed branch, pole, or post. Even when some Red-tails are exposed in the open, individuals can be fairly approachable, and being large birds they provide a big subject for photographers to focus on, especially when soaring or in flight.
Looking back, a Red-tailed Hawk probably provided some of your first good bird photographs, probably for some of the reasons provided above, but if you’re like me, you never tire of photographing these commoners of the raptor realm. Realistically though, the variations in plumage they show and the photo ops they provide in flight and when perched continues to make Red-tailed Hawks favorite birds to photograph, and fall migration is a prime time to see them more often. With migration in full swing across the continent, different populations of Red-tailed Hawks are mixing at stopover locations, and some impressive individuals may show up, such as dark morph Harlan’s Red-tails, and mostly white Krider’s Red-tails. But even finding darker brown Red-tails with broad belly bands adds a boreal forest flavor to the mix, while others with unmarked white or beige undersides make these grand hawks interesting subjects too.
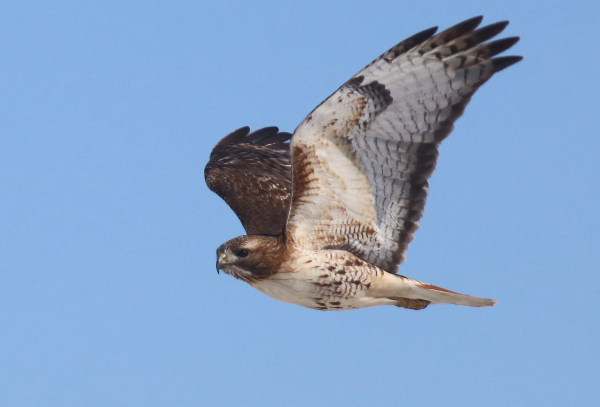
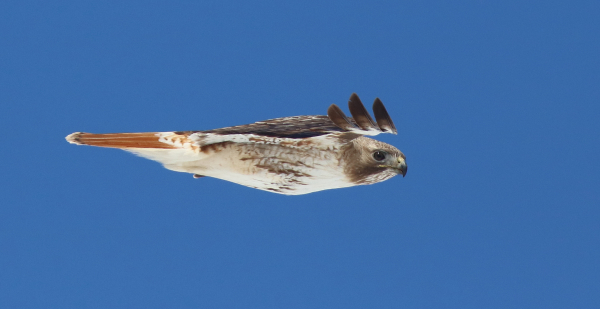
The tell-tale tan tail feathers identify this Red-tail as a first-year bird. Obviously this photo was cropped a bit differently, removing the outer half of the wings, but in this case we think it works to emphasize the head, back, and tail of the bird in flight – call it an interesting design option (photo info: 400mm zoom, aperture f-8, shutter speed 1/2500, ISO 400).
|
Providing a little more variation, there are also the young Red-tails with brown tails, adults with orange-red tails, some with darker red tails, or lighter orange tails, and even those with half orange tails in which the base of tail feathers is colored white. Some Red-tails show thin black bands across end of their tail feathers or multiple thin bands across the length of their tail feathers, although you may not see the bands until you review resulting photos. One of the hardest photos to procure is one of a yearling Red-tail that is molting its tan-brown tail feathers, one by one, just as new orange-colored adult tail feathers grow in. Be sure to watch for an opportunity to photograph one of these yearlings in the midst of a tail molt to document it with some tan first-year feathers mixed with new orange adult tail feathers.
For some birders, raptors present tough IDs, and it takes time and experience in the field to positively identify birds of prey. But a great tool in the identification process and a super way to gain experience and expertise quicker is to use your camera to record the raptors you see, especially the hawks you are unsure about. By documenting different birds and different postures with your camera, you will find that by reviewing these documentary photos you will become better at identifying hawks, including the varied plumages of Red-tailed Hawks.
Let’s Photograph!
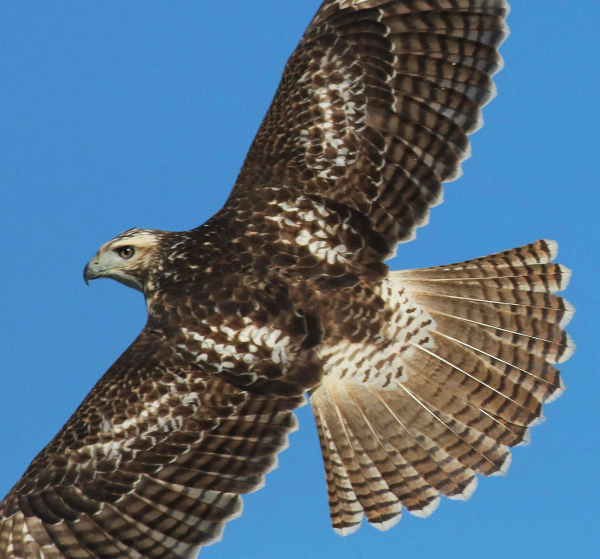
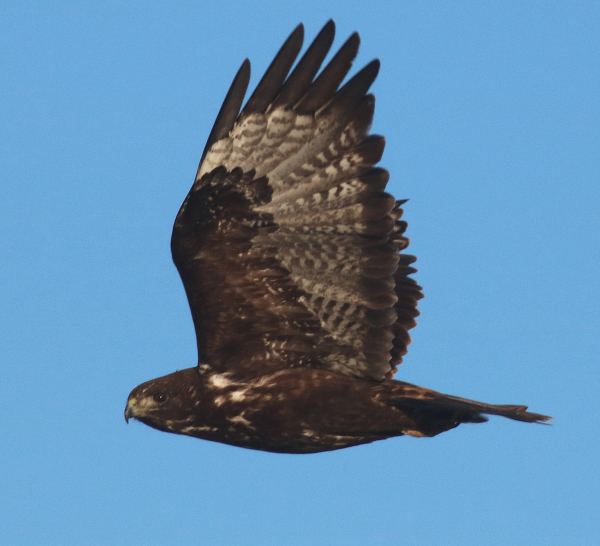
This classic full-spread hawk flight photo of a recent fledgling shows the dark shade of brown plumage on a Red-tail photographed in the northern Rocky Mountains (photo info: 400mm zoom, aperture f-9, shutter speed 1/400, ISO 400).
|
Photographing birds of prey can be one of the more thrilling aspects of bird photography, and by photographing common species like Red-tailed Hawks, you will become better at photographing raptors overall – you will be experienced when a Peregrine Falcon or Golden Eagle flies your way. Even so, photographing Red-tails is no less exciting, especially when you find a bird that varies from the norm, a dark morph Red-tail, or another “different” individual. Whatever the raptor in focus, photographing birds of prey isn’t much different than photographing other birds, but somehow it always seems to be a bit more exciting.
That said, use all the same rules of bird photography: Keep the sun at your back, steady your lens as much as possible, hold your breath any time you press the shutter button, use as fast a shutter speed as possible during flight photography, be aware of distractions in the background that you might avoid by moving a bit right or left, watch for shadows on the bird, and emphasize photographing during sunny mornings and late afternoons (avoid midday when the sun is overhead). For a full description of bird photography do’s and don’ts, refer to the Bird Photography feature provided 2 weeks ago in the September 28 issue – that’s as complete a bird photography reference as I’m aware of, and it’s short and sweet.
Try not to get too close to hawks; allow them to behave naturally. When you stop short of making birds fly, they may actually move closer in your direction. If you try to approach a hawk, keep a low profile while keeping the sun at your back; move slowly, and don’t walk directly at the bird; instead, walk at an angle to the bird that gets you ever closer, slowly zig-zagging if necessary. Stop periodically and wait, let the bird get familiar with your presence; in fact, don’t look at the bird too much, but be ready to photograph in case it decides to reposition.
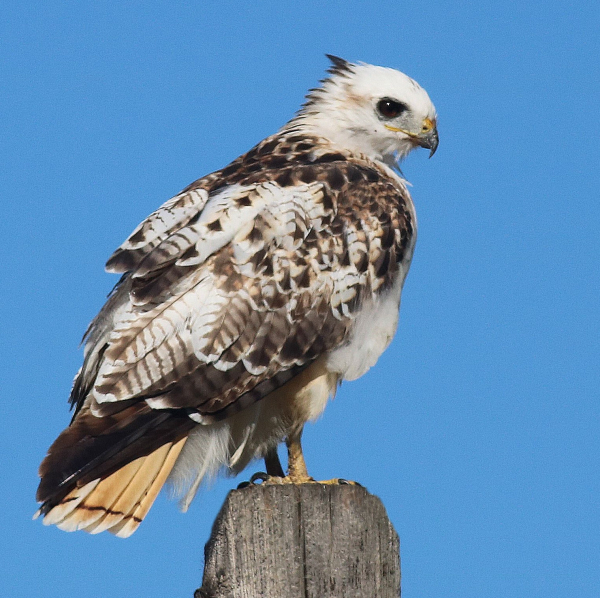
Usually encountered in the Great Plains, Krider’s Red-tailed Hawks are exceptionally white overall and characterized by a white head, a mostly white ventral side, lighter than normal dorsal plumage, and light-colored tail feathers.
|
Flight photos of hawks create the most dramatic images. The quality of your photos will improve if you emphasize watching for shadowing on the underside of the hawk, especially when a bird is soaring overhead. Shadows will register darker in photos than they look visually in the field, so while it may seem like you are getting a fine photo, you may be disappointed by dark shadowing that in extreme cases turns the bird’s image into a mere silhouette. A good plan is to wait for the hawk to bank into the wind; then, as it tilts or lifts one wing up the sunlight should illuminate at least one wing and the hawk’s body. If the bird is soaring you may get a few chances to photograph it as the sun brightens its plumage and coloration.
As a hawk is flying from side to side, try to photograph the bird as it raises its wings and as it lowers its wings. Usually, this will allow the sunlight to highlight the underside of the bird or the top of the bird, depending on the wing position. When you are actively photographing hawks in flight, setting your camera on the Al Servo “continuous” mode will allow you to take a quick series of photos – from 3 to 10 or more per second, depending on your camera. Within such a series of images, one or maybe a couple may stand out as “keepers.” Realistically, if you are taking single photos at a time, it’s hard to react in time to what you are seeing as a hawk flies by, flapping in quick succession, or even when it’s gliding effortlessly.
Even so, try to anticipate the next move of any hawk you are photographing, and be prepared to react to any fast action that may ensue. Focus on one eye of the hawk, or on the head if you’re a distance away. Photographing hawks provides some added levels of excitement – you often get just a few moments to photograph a passing hawk, so think fast, act fast, and keep your cool.
Hawks First
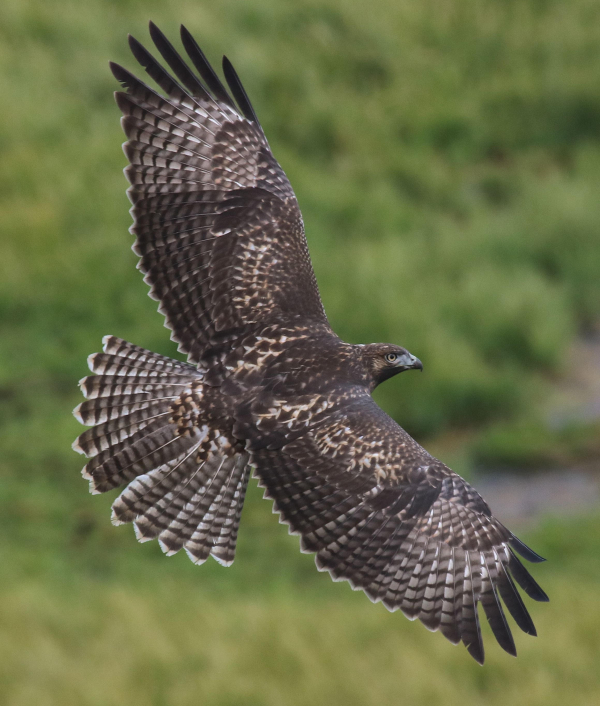
Nesting populations of Harlan’s Red-tailed Hawks are mostly found from British Columbia to Alaska, with migrating and wintering Harlan’s filtering south across southwest Canada the western United States. Dark morph Harlan’s look all-black in the field and their tail feathers are usually a mix of gray, white, and black-brown, sometimes with a bit of orange (photo info: 400mm zoom, aperture f-8, shutter speed 1/2000, ISO 400).
|
Watch the hawk for behavioral cues to judge whether it is concerned with your approach; if you see it change its level of concern, stop and wait. Sometimes it will relax again after a few moments, then you can try to take a few more slow steps forward. Different individuals behave differently; some are indifferent to a closer approach, while some will fly immediately upon noticing you – you never know.
Try not to disturb hawks when trying to photograph them; but often a hawk will merely fly to the next post and resume its activities at a more comfortable distance. At that point either wait the bird out to see if it might fly in your direction on its own accord, or leave the hawk to find the next photo subject without pressing it further. If you get the impression the bird is hunting, give it a little wider berth too, trying not to disturb it while it is trying to find food to sustain its migration or stopover period.
In short, the birds come first. But every once in a while, you will find a special hawk; one that permits you to get relatively close. And when that happens, when you find that trusting hawk, spend some time with it, appreciate the opportunity, and photograph to your heart’s content. Try some different apertures as the bird loafs, preens, and watches its surroundings. Then, if it takes flight be ready, and take advantage of each wing beat, trying not to tense up – follow the hawk’s flight through your lens by swinging in a relaxed flow – and that’s when you might get the best photos of that shared session.
Whether photographing Red-tailed Hawks or any other species, enjoy the birds, learn how they behave, how they search for food, and how they interact with other birds and animals. Learn their flight patterns and silhouettes, and do your best to take quality photographs of the birds you encounter this fall. Without question, bird photography can be the most rewarding and most fulfilling aspect of birding, and when our quest takes us into colorful fall landscapes on sunny days where we can hear ourselves breathing as the tall grasses catch a light breeze and golden leaves fall to the ground – oh what fun we birders enjoy!
Article and photographs by Paul Konrad
Share your bird photos and birding experiences at editorstbw2@gmail.com