
By now, you’ve started taking photographs of birds, and I hope you have already taken some beauties. Each digital photo you take is initially automatically stored on a memory card in your camera, so what next? Your first inclination may have been to store your photos on your personal computer. That’s fine, but most photographers take so many photos that they prefer not to keep their digital photo files on their home or office computer. Instead they save their photo files in a separate external hard drive, which is a compact device about the size of a cellphone that you connect to your computer when needed. I find this plan is the best bet for photographers.
To download your photos from your camera memory card to a hard drive, you simply plug your memory card into your computer’s memory card reader. If your computer doesn’t have a built-in card reader, you will need an external memory card reader that you can plug into your computer; then plug your external hard drive into your computer, and download the photos from your memory card onto your external hard drive.
After you have downloaded photos from your camera’s memory card, and double-checked to make sure your photos have definitely been transferred to the external hard drive, you can erase the photos from your memory card. This is usually accomplished by re-inserting the memory card into your camera and formatting the card, which effectively erases the memory card, and you can take your next series of photos starting with a clear memory card. You will repeat the process every couple weeks, or whenever you wish, with the understanding that your memory card is a short-term place to collect the photos that you soon download to a permanent photo library in your external hard drive.
Now you have an external hard drive with all your photos – a working copy of all your photos – your photo library; perfect. Your photos will become so important to you that you don’t even want to think about losing them in some way due to fire, flooding, theft, etc. As a precaution, it’s recommended to “double-save” all your photos. That is, you should have a second back-up external hard drive with a second copy of all your photos that you can keep somewhere separate from the first copy of your photos, which you update every month or so. Then, be sure to “hide” that second copy in a location outside your home – perhaps in your office, or better yet, in a locked fire-proof safety deposit box stored in a building separate from your home or office).
Initial Photo Editing
After returning from the field, it’s exciting to review the digital photos you’ve taken. While you’re at it, after you go through the images for an initial look, it’s also a good time to do some initial photo editing – deciding which photos are worthy of keeping, and which ones should be deleted. Initially, the editing process is a matter of deleting poor quality images – blurry, unsharp, or poorly colored images; photos with distant subjects, with birds in unattractive positions, or poorly lighted photos tend to be delete-worthy.
Then too, within this editing process, I always pick out the real keepers – the photos that stand out that I want to keep and share as favorites. I make a copy of these images and place them in a ‘keeper file’ named something like: “Best of 2019.”
How you edit photos is open to your personal interpretation. From experience, I can share that it’s important to keep on top of your photo editing process so it doesn’t become a big job. Editing photos is fun, or it should be an enjoyable part of the photography process. Try to review and make a quick initial edit of your photos after each outing. I will also share that personally, I like to preserve something of a record of my photography, so I keep a lot of photos in my files that are not great images, but they document what I was photographing and where I was when I took a photo or series of photos. It’s nice to have these images on file to refer to “for the memories” if for no other reason - they are documentary photos if nothing else.
Organizing Your Photos
The first thing to do with the photos you consider your best is to name them – give them a title that will dictate where the photo is positioned in a file and that will provide some simple information. Photos are automatically filed by number, then alphabetically, in any computer or external hard drive. Therefore you can use this information to your advantage when writing titles for your photos and files. Everyone has their personal way of naming photos, but I’ll share my method, which has evolved over years and serves me well today to give you an example that you can improve on or modify to better serve your interests.
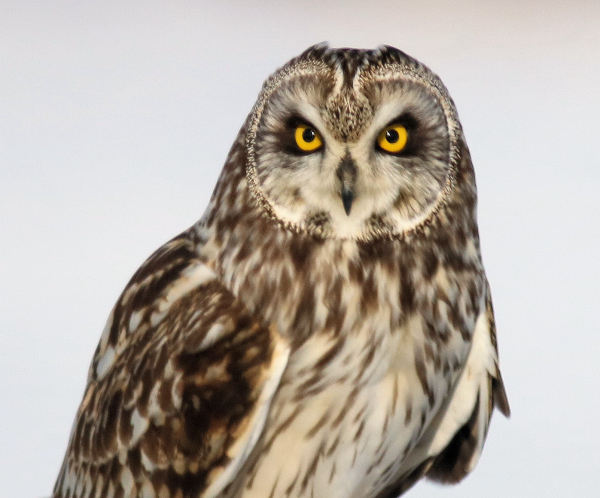
An example of my photo naming method is: “Owls – Short-eared Owl portrait ND 3-18” (see photo).
. 1) First, I categorize all my bird photos by bird groups I prefer to use, such as Ducks, Geese, Raptors, Shorebirds, Songbirds, and Wading Birds to name a few.
. 2) Next I add the species name, followed by the sex of the bird if relevant, or the age of the bird if it’s not an adult;
. 3) then a short description of what the bird is doing – flying, swimming, perched, feeding, etc.
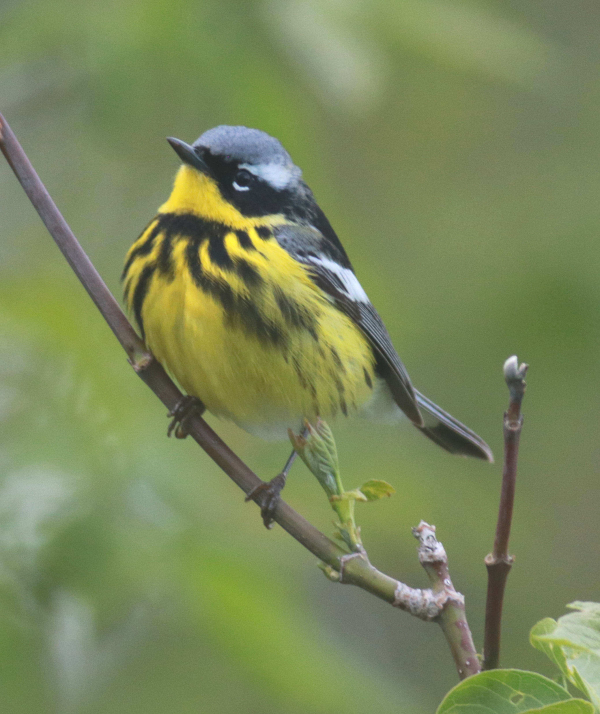
. 4) I also add the state abbreviation to indicate where I photographed the bird, followed by the numeric month and year, such as FL 11-19. A given title may be: “Warblers – Magnolia Warbler male perched in woods OH 5-19” (see photo).
You, of course, will develop a photo naming method that works best for you. Above I described the way I name individual photos; below I describe how I name files where I keep groups of photos, usually with a reference to the date they were taken.
File Names
I usually download the file of photos on my camera’s photo card twice each month, but sometimes more often. On a photo trip I may download daily, and many people download after each trip afield. Usually, I photograph for a short time most sunny days, so I tend to wait until I have a significant download – about every two weeks.
I name each downloaded file, which may include hundreds of photos, by date and subject for quick reference. A file may be named “May 15-30 – Neotropical Songbirds, American Avocets feeding, first Bobolinks, White Pelicans soaring.”
Within my filing system, I put each downloaded file into an appropriate seasonal file entitled “Winter,” “Spring,” “Summer,” or “Fall.” (Personally, for filing purposes, I place photos taken from January through March in a file named “Winter,” photos from April through June in the “Spring” file, etc.) At the end of each year, I file the four seasonal files into an annual file named “2019 Photos”, then I start a new seasonal file. It all works very well for me as I sort through files to find photographs of certain birds or representatives of certain bird groups as needed.
Again, you can develop a file naming method that works best for your personal interests. You can also make a variety of favorite photos files, or trip-specific, or bird family-specific files, for instance. When I do this, I leave the original photo in its original file and copy a duplicate of the photo into favorite photo files.
Advanced Photo Editing
Back to your “Best of 2019” photos: Some of your best photos will probably need a little more attention beyond just naming and filing them. Some photographs benefit from a simple photo editing option – simply cropping them – that is, cutting out extraneous material in a given photo frame. If your photo has a bird in the center with excess landscape or sky surrounding it, you can “crop” excess or unsightly background elements. Cropping also serves to magnify the subject, and this can easily be accomplished in the modern digital darkroom – your computer – using a photo editing program.
Cropping may be the only change you make to the original photo, but in some cases it is a first step in a process that might include a couple other simple edits, such as sharpening, lightening, or adding contrast in extreme cases. I will share a few insights into these advanced photo editing techniques in the next Bird Photography article.
For now, you have this guide to help keep your photos organized, plus some advice about how to keep your valuable photo files copied, protected, and safe. In the meantime, get out in the sunshine with your camera in search of birds, and enjoy taking the next great photos birds provide for you – that’s really birding at its best.
Article and photographs by Paul Konrad
Share your bird photos and birding experiences at editorstbw2@gmail.com