
Last week, I remarked about how lucky we are to have the remarkable cameras available to photograph birds, and shared a wealth of insights about what’s available to birders who wish to shop for their next camera and lens as a starting point – a baseline. The idea for the article came from a birder who was looking for an economical “simple to use” camera to photograph birds, and I hope he and many other birders will be served well by the experience and information I passed along.
In that article I addressed the economics and quality interests to consider when shopping for bird photography equipment. But after sharing that information, I decided I wanted to provide a specific article to address the “simple to use” digital camera option. Certainly, anyone can get overwhelmed by the terminology and variety of features used to describe each camera model and lens, but for bird photography you can simplify your camera settings down to 6 choices. Then, once you are dialed in, you can keep them fairly standard.
Granted, there are a lot of bells and whistles, and you may think you are missing out on something by not learning about every little aspect of the long list of features today’s wonderful digital cameras provide. But bird photography is a very narrow niche of photography, and the technical aspects of using your camera to photograph birds are really only related to 6 basic technical settings: Autofocus, Al-Servo, ISO, the Mode, the Aperture, and the corresponding Shutter Speed.
Autofocus – This is the simplest of all settings, you merely choose whether you want to use autofocus or manual focusing, which only requires you to move a tab to one or the other option. It’s almost always best to use the autofocus, which allows you to concentrate on the movements of a bird, or composing the photo with regard to the landscape surrounding the bird. Usually you need to hold the shutter button down lightly to employ the autofocus, and hold it down continuously to keep it focused on a moving bird.
Al-Servo – The camera’s Al-Servo setting allows you to take a continuous series of photos. Then, when using this setting, you can take a single photo, but you can also take 2 or 3 at a time if you hold the shutter button down a moment longer. And when a bird is especially active, such as when it’s flying, you can hold the shutter release button down for the camera to take a continuous series of images at a rate of 3 to 15 photos or more per second, depending on the camera model you use.
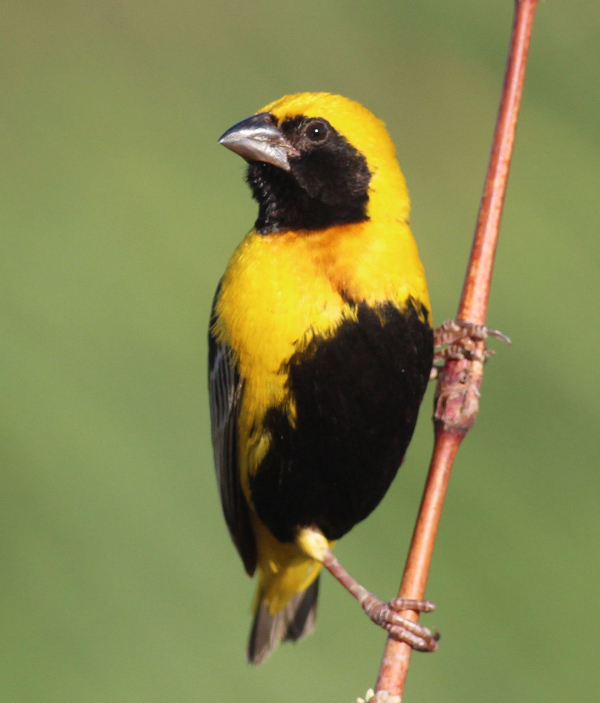
This small Yellow-crowned Bishop is highlighted against a fairly uniform green background by using an aperture of f-6 that created a narrow area in focus that blurred out the distracting plants behind it (aperture f-6, shutter speed 1/1000, ISO 400).
|
Using the Al-Servo setting, I tend to take 2 photos at a time, which provides a second image that usually shows a wing position change during flight, or provides 2 images as a bird turns its head. But when photographing a bird or flock of birds in flight, I tend to take between a few images to several photos in quick succession to document split-second moments in a series of photos. This allows you to select your favorites, and disregard or delete others during the editing process. Each person finds there own way of using this impressive feature, and some prefer to take a single image at a time, which is always an option.
ISO – Personally, I find the 400 ISO setting to be the best general setting under good sunlight conditions. I tend not to photograph during low light periods, but if the sun goes behind a cloud, I increase the ISO to 800 if the shutter speed is reduced significantly by the shaded sunlight. I find that any setting above ISO 800 tends to produce grainy photos. Using an ISO of 200 or 100 provides better quality images, but these settings tend to limit your shutter speed and/or aperture a bit, so ISO 400 seems to be the best bet for me for bird photography with the sun at my back.
Mode – The Mode dial provides a variety of options ranging from automatic to manual. First, please don’t use the automatic setting on your camera. Instead, I always suggest it’s best to set the Mode Dial to the Av preference; then set your aperture (f-stop) and the camera will automatically provide the associated shutter speed as determined by the amount of available light. The Av Mode really works well for bird photography and other photo options, and it provides an opportunity for you to compose your image in a number of ways using the aperture as your guide.
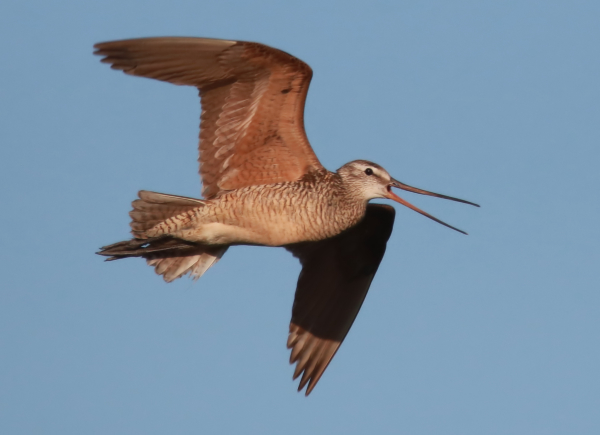
Aperture – Aperture and shutter speed are inherently connected so when you change one, the other will change correspondingly, all tied into the amount of available light the camera’s light meter detects through your camera’s lens. Aperture alone will dictate the depth of the area in focus so it’s important to be aware of how to do this to improve a given photo as you compose it. During sunny days, I preset the aperture to a standard f-8, which provides a broad enough area in focus to include the bird and some background and foreground. If you wish to try to blur out the background, which will help to emphasize the bird, you can try dialing the aperture to f-6.
Conversely, if you wish to increase the area in focus to include a sharper deeper landscape in the background, you can dial the aperture to f-10, or even f-12 or f-14. However, you should always be aware of how changing the aperture affects your shutter speed, which is also important to any photographs we take. So while you want to be aware of the shutter speed, you can easily check the shutter speed and aperture readings as you look through the lens, simply by pressing down lightly on your shutter button.
Shutter Speed – By using the Av setting, your shutter speed is provided automatically in reaction to the aperture you select and the amount of light available. As noted above, during sunny days, I preset the aperture to a standard f-8; and the resulting shutter speed will usually be between 1/1200 to 1/2000 – fast enough to stop most motion in a flying bird, and therefore fast enough to provide sharp clear photographs of birds engaged in almost any other activities, including simply perching, swimming, or resting.
You will quickly learn how dialing the aperture from f-8 to f-10 will change the shutter speed, as well as if you change the aperture from f-8 to f-6 for example. That information will become somewhat second nature after photographing a short time, and you can always double-check the aperture and shutter speed as it is provided on the side of the photo frame as you look through the lens.
Ready for Action
I preset my camera so I’m ready to take a photo at a moment’s notice, which happens fairly often when photographing birds. Then, when I’m photographing a bird and have an extra moment, I double-check the settings and adjust any if needed before taking other photos.
I provide information related to camera setting options almost every week in this Bird Photography feature, which are often called out under a “Tech” heading. And if you have a problem or question, I can always try to help with some bird photography insights. We encourage you to contact us at the end of several articles, including this one, at editorstbw2@gmail.com
I liken the inherent reaction to all the bells and whistles on a camera to a similar situation we all face when using a computer, or even a cellphone, which is also a computer, albeit with a dandy telephone connection. We don’t need to learn about or know how to use everything these remarkable devices are capable of, we just need to concentrate on the aspects of the device that we use, or would like to use. Different people use different computer or cellphone programs, apps, and files for their personal needs – and that’s what we do when we narrow a camera’s many options down to the 6 basic technical settings that we need to learn about for Bird Photography.
Most of us should have a little extra time over the coming holiday weekend, and I encourage you to make some extra time to enjoy and practice bird photography, whether its in your yard, at a nearby natural area, or by stopping off at a refuge along the way to grandma’s house for holiday dinner – Happy Thanksgiving!
Article and photographs by Paul Konrad
Share your bird photos and birding experiences at editorstbw2@gmail.com