
During recent months I’ve emphasized the idea of using an aperture-priority camera setting, which is designated by an “Av” on the Dial Mode on Canon cameras, by an “A” on Nikon cameras. I use this setting about 99 percent of the time for any bird photography – probably closer to 100 percent of the time. The idea that this mode is an aperture “priority” is a bit of a misnomer though, because I use the setting to ensure I get the very fast shutter speeds I want during most of my bird photography.
Initially, I like to be ready in advance of even seeing a bird. I preset my camera with respect to the lighting conditions, and because I rarely photograph unless the sun is shining, I preset my aperture to a regular f8 setting. Using the aperture-priority setting, the camera automatically calculates the balancing shutter speed, which is likely more than 1/1000 of a second, and often as fast as 1/2400 of a second (when using an ISO setting of 400).
Why do I use that aperture? I’m trying to get a relatively broad area in focus using the f8 aperture, but I’m really trying to ensure a very fast shutter speed, which is provided automatically when I use that f8 aperture. If I switch to f5, the shutter speed will be even faster; and if I change the aperture to f11, it will be slower – possibly less optimum. You will have your own aperture preferences and will better appreciate what works best for you under different conditions and in different habitats, but I wanted to share my take to give you a reference point.
Avian Options
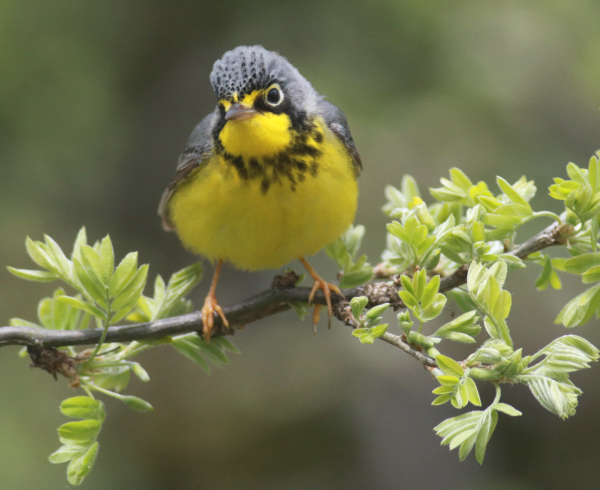
By using a narrow area of focus – an f-stop of f5 – the branch with budding leaves used as a perch by this Canada Warbler are in focus, but the background foliage is blurred, which emphasizes the bird within its immediate surroundings. The resulting shutter speed was also fast enough to stop the considerable action of the foraging warbler.
|
Sometimes, especially when a bird gives you an opportunity to photograph it for an extended period, you can make adjustments to get the optimum aperture and shutter speed settings for the conditions at hand. With a trusting bird you may even be able to try a couple settings to test what works best for a given photo opportunity.
After taking initial photos using an f8 aperture, for example, try an f5 to get a portrait-like blurred background, then change to an f14 aperture for a background showing natural elements more clearly. Your aperture-priority will provide the corresponding shutter speed automatically, but there is always the chance that you don’t have enough light to use an f14 aperture, so keep that in mind too – that is, double=check the shutter speed to ensure it’s fast enough for your interests.
Creative Apertures
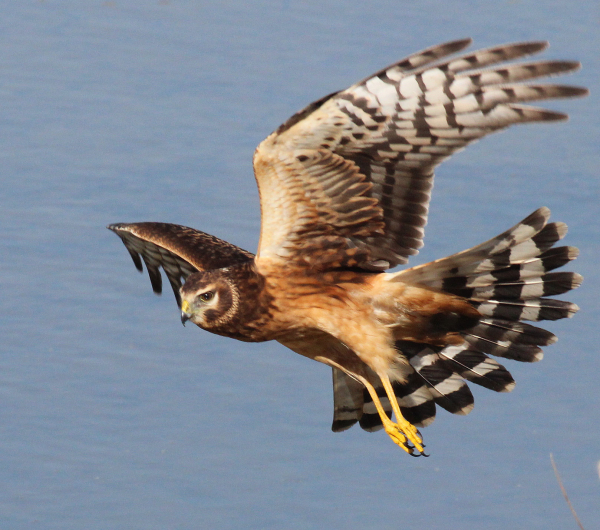
Sometimes, rather than trying to tie the background into the photo, the background can be distracting, even unattractive. That’s when a narrow area of focus can produce a most pleasing photo by blurring the background out of focus – effectively blurring the area behind the bird to a fairly monotone color. A forest of green leaves and branches can sometimes be turned into a pleasing green unobtrusive background, or a dry grassland landscape is turned into a fairly uniform tan background that emphasizes the bird in much the same way a studio photographer does to take human portraits.
This option is possible when your subject is in a position where the background is separated from the bird by several feet, or many feet. That’s when you can help to emphasize the bird and blur the entire background out of focus by using an f5 aperture setting. This usually nullifies background foliage or other distracting material, resulting in a mostly uniformly colored background.
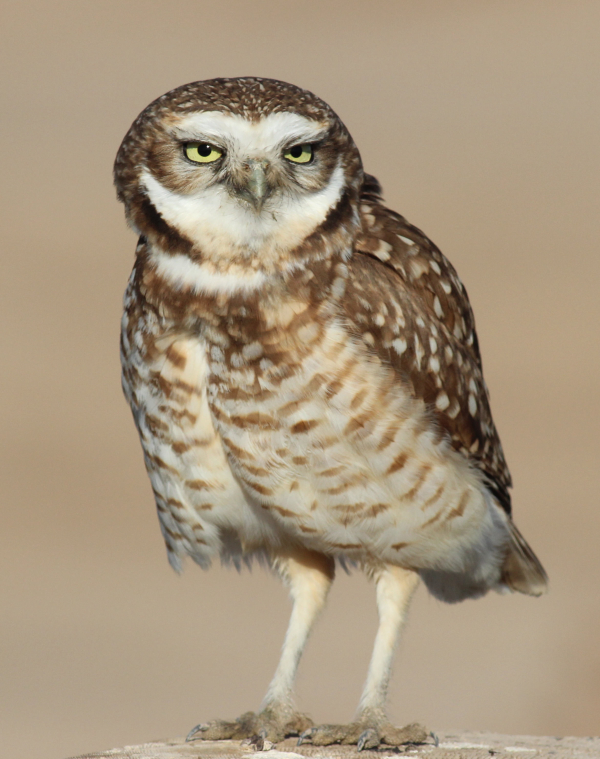
This option doesn’t work if the background is close to your subject – or if it is surrounding the bird. But sometimes a branch or leaves or grass can add a natural setting too, and you can emphasize the detail of the background by using an f11 aperture to extend the area within sharp focus, including the immediate background.
There is a happy medium too, when you get a colorful bird perched on a branch with a few budding leaves – all in focus – but with the background far enough behind the bird, branch, and leaves to be blurred out of focus. When this is possible, it can create some especially pleasing photographs, as illustrated by the photo of the Canada Warbler in this article.
Aperture-Priority Is a Great Option
Actually, for me, aperture-priority isn’t even an option – it’s a must. Unlike an automatic setting, aperture-priority simplifies, but it doesn’t over-ride, a photographer’s thought process or creativity.
The photos that illustrate this article will give you a better appreciation for how to use the aperture setting in the best possible ways to get the best photo results under a variety of field conditions. Keep the sun at your back and enjoy all your birding experiences, especially those with your camera in hand.
Article and photos by Paul Konrad
Share your bird photographs and birding experiences at editorstbw2@gmail.com