
Spring is a season of renewal, so this first week of spring I thought it would be a good plan to revisit a few basics that will help you improve the percentage of quality bird photos you take, just by following some simple bird photography techniques. The information is pretty basic, but ultra-important! So let’s get started by delving into 3 especially important bird photography topics – Lighting, Positioning, and Timing. This information will be good reference material for more advanced birders, but for newer bird photographers it is information you can use immediately that will make a huge difference on your photographs now, and in years to come – maybe even during your next outing. Let’s get started so you can enjoy more productive birding episodes with your camera right away.
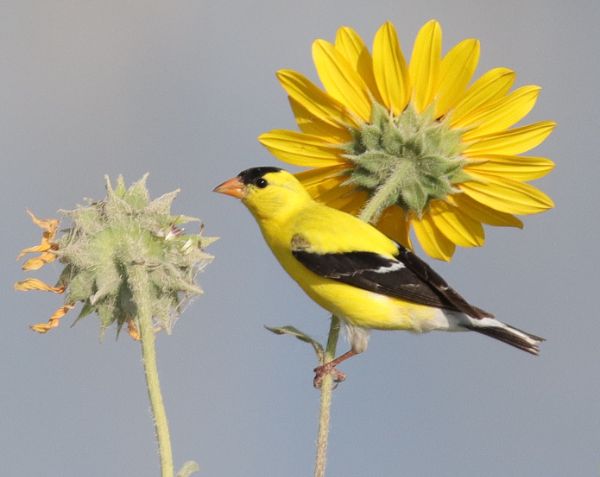
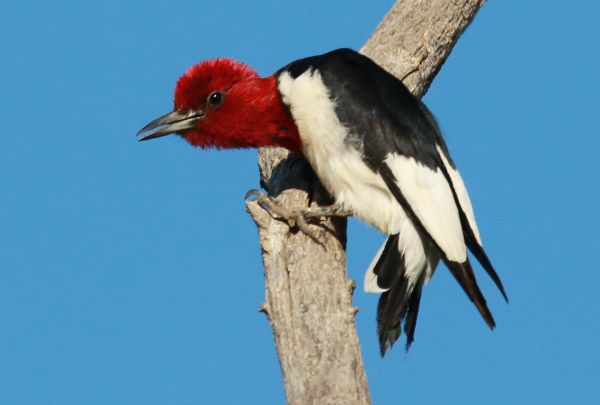
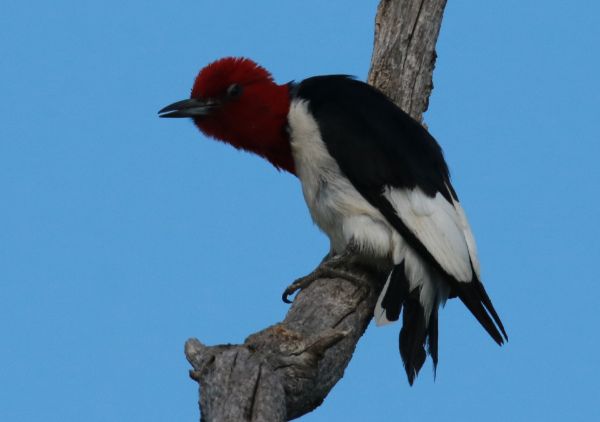
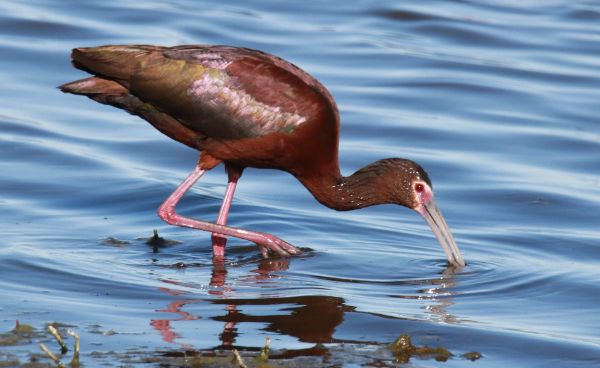
Lighting can make or break any given photograph, and bird photography requires good light as much or more than other forms of photography. Because birds are found outdoors, sunlight will be your primary light source that illuminates your subject. Sunlight provides the brightest, truest colors, it “activates” iridescent plumage, and it adds a spark of light reflected in the eye of the bird when you are in the right position. Sunlight also provides the chance of using the fastest possible shutter speed to ensure sharp photographs, especially during action photography.
Conversely, if there is no sunlight or inadequate sunlight from the correct direction to illuminate the bird or birds before you, the colors are subdued, at best. Also, the reduced shutter speed may affect the sharpness of the birds’ image in the photos you take, especially when you are taking action photographs, including photos of flying birds. With lighting in mind, I plan all my bird photography outings by asking the questions, “Is there sunshine?” and “Will there be sunshine?” I usually find something else to do under cloudy conditions, although non-photography birding is still an option under the clouds. But you are best off waiting for the next good sunlight period to use your camera, unless you’re happy with just getting some practice time. Good lighting is all-important for bird photography.
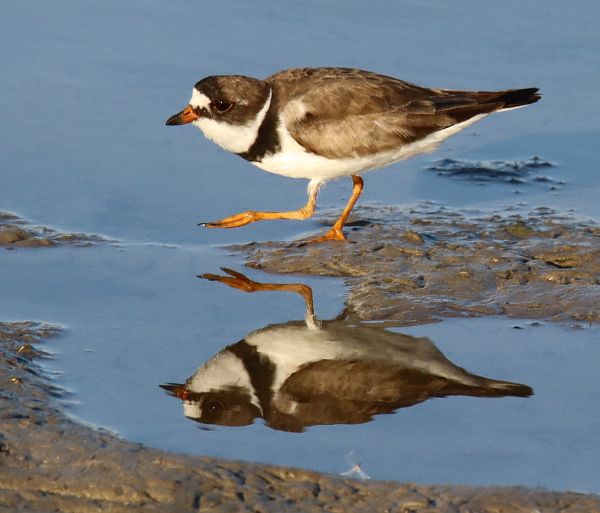
Positioning: To make the best use of good sunlight, you need to be positioned between the sun and the bird. As a quick reference, your shadow will point to where you really want the bird or birds to be positioned to take advantage of optimum lighting on your subject. Try to position yourself so your shadow points directly at your subject. Get in the habit of checking your shadow as soon as you walk outside so you know the direction of the light, then plan your birding walk or drive so you will be in a position to edge into the best position with your shadow pointing toward your subject. Another way to double-check your positioning and where you need to be is to keep the sun at your back (but also check for your shadow in front of you).
The way you position yourself can also be related to your proximity to a bird. Become familiar with the range of your telephoto or zoom lens, and how close you need to be to your subject to make your photo worthwhile. In most cases you will want to fill about half of the photo frame. With that in mind, you can gauge how close you want to get in order to take the best possible photos. But if you can’t get as close as you would like to be, remember that you can always crop extraneous background after you get a sharp photo in the field. Always be sure to keep the birds in foremost in mind by not disrupting their activities by trying to get too close. With time, you will learn how birds act and react, and you will usually get an indication of when they become uncomfortable with your approach in advance.
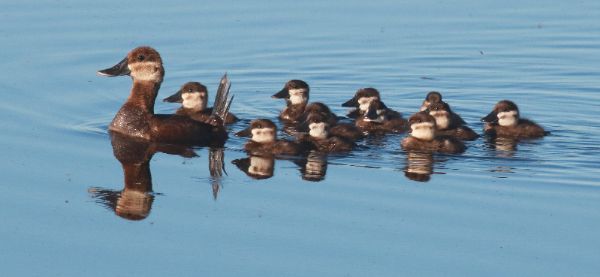
Keep in mind that it can sometimes be effective to photograph from a lower profile – squatting or kneeling to get closer to the bird’s level when that is possible, or when it’s effective. For example, you may want to emphasize birds as they swim or wade in water, or while they forage along a beach, marsh, or woodland edge.
Positioning can also refer to your posture: Whenever possible, make a good base by spreading your legs slightly and stabilize your camera-lens combo in the best possible way – lean your lens against a stationary object when possible, like a tree trunk, branch, post, building, vehicle, etc. It also helps to tuck your elbows into your chest or the sides of your rib cage to help stabilize yourself and your camera, rather than holding your elbows extended out from your shoulders – and hold your breath when you take a photo. (These tips are good for stabilizing your binocular views too.)
Timing: To make the most of my time in the field, I plan photo outings when the sun is shining, or when it will be shining. So I constantly refer to weather reports to plan ahead for good sunlight periods – especially when I’m planning an extended drive or birding trip. A strong wind can be a factor too, especially because birds tend to lay low and be less active during strong wind, especially in open areas including water features and grasslands.
Timing and good lighting are often interwoven, with the best light options during a given day often dictated by the time of day. The best photo time is when the sun is at a 30- to 60-degree angle above ground level (90 degrees is straight overhead). From late spring to early autumn, when the sun is overhead during midday, the best times to photograph birds is during the morning and late afternoon hours. But during late fall and winter the sun is at a relatively low angle in the south throughout much of the day, so you have a greater period of good sunlight angles for bird photography – as long as the sun is shining.
Part of trying to optimize your photo periods is to avoid shadows on the birds. For example, when the sun is overhead, the underside of any bird will show a shadow that shows darker in a photograph than it does in your view. Even if the sun is shining, if the bird is in a shaded location, the colors, contrast, and sharpness will be muted. It’s all part of bird photography, and it’s a very important part.
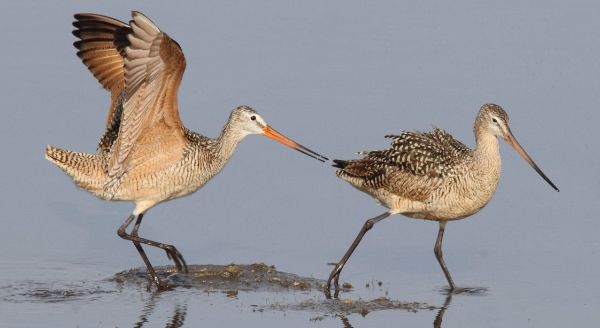
Another important aspect regarding timing is that when you are positioned to take advantage of the best light with a bird in your photo frame, keep in mind that birds are quick. Take an initial photo as quickly as possible, then keep the bird in focus and wait for the next, possibly better photo chance to push the shutter button. Even just the turn of the bird’s head can provide a different perspective and an optional photo. But birds are quick, they are here, and then they’re gone, in an instant. They perch, then they move, hop, fly, or run to the next position. Try your best to anticipate such movements, and make the most of them to take action photos in addition to portrait images.
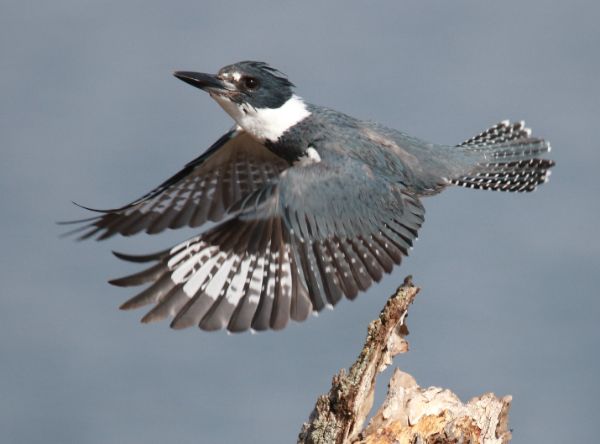
Although birds are as unpredictable as any animals, it’s always good to try to predict what might happen next, and anticipate their movements in advance so you are prepared and ready to take action photographically. Even at your fastest, it takes a split second for you to react, so in the sometimes fast-paced action of bird photography, try to predict birds’ movements and be prepared. When the bird’s action warrants it, take a series of photos – with the hope that your prediction and reactions pay off with a select photo, or a series of 2 or 3 images.
Today, our digital cameras are so advanced that we can rely on their exceptional technical qualities, which permits us up to concentrate more on real bird photography – the extension of birding that I believe provides the greatest rewards and the most exciting encounters with birds. So much of what I know about photographing birds comes from experience. Eventually, your mind and body work together, sometimes instinctively, sometimes out of practice, and sometimes with the advantage of experience. Above all, get out there and seek your own bird photography experiences: Use some of my suggestions, learn in the process, and improve your own photo techniques and preferences. Do what works for you, and enjoy yourself and the photos you create.
Article and Photographs by Paul Konrad
Share your bird photos and birding experiences at editorstbw2@gmail.com