
When you have your camera in hand and you’re reading the model’s directions, even someone with years of experience can be overwhelmed by the variety of settings, the range of options for a single setting, and when to use each one. That’s where it helps to focus on one thing – one aspect of photography – in this case bird photography! For bird photography purposes, there are really only three primary settings you need to consider: The ISO, the aperture, and the shutter speed.
The ISO is a basic setting that determines the amount of light you have to work with to compose photographs. ISO settings have a broad range; the lower the ISO number, the better quality your photos will be. I tend to use an ISO of 200 or 400, which are very versatile setting in sunlight conditions. If you can photograph at ISO 100, more power to you. But when using a telephoto or zoom lens, an ISO of 200 or 400 will provide much better ranges of shutter speed.
As you use ISOs above 400, your photos will become more and more grainy, so try to use a maximum of 400 whenever possible. In lower light conditions, especially during cloudy days, I increase the ISO setting to 800, but I rarely go beyond that. As sunlight fades, you may need to dial the ISO to 1600 or higher, but by that time your photos are going to be very grainy and you might as well admit that photo time opportunities have passed.
Personally, I tend to use an ISO of 400 for every day sunlight conditions because this setting provides very good quality images and a lot of versatility so I don’t need to change the ISO. An ISO of 200 might be a better bet for some photographers. If I have an extended time with a photo subject, I might adjust the ISO from my usual 400 to 200 when conditions permit. But too often, I forget to switch back to 400 when conditions dictate that change, so I prefer to set the ISO at 400 and leave it there. If you’re just beginning, that’s a good bet for you too.
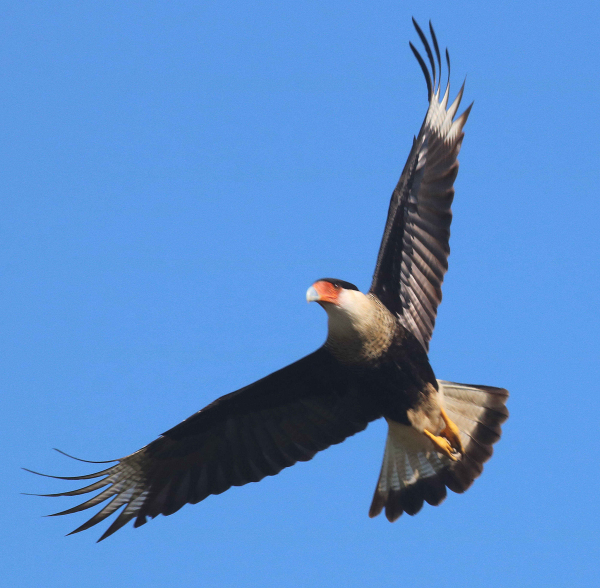
The Aperture and Shutter Speed setting work together – or against one another – depending on how you look at them. Nonetheless, your camera will help you to coordinate the relationship between the two settings by using an AV setting. The AV setting allows you to set the aperture you prefer, and the camera automatically adjusts the corresponding shutter speed. For bird photography, I set the aperture at f8 if there is a lot of light and I get a fast enough shutter speed to stop the motion of flight, say 1,000/second or faster.
I like to keep the aperture at f8 if possible, so there is a good area that is in-focus for flight photos; but you can always reduce the f-stop (aperture) to f6, for instance, which will increase the corresponding shutter speed. If you don’t have much light, do the best you can to emphasize the fastest shutter speed possible, and you may find that even a 1/250 of a second shutter speed might provide a great flight photo, and a little action in the wings can show motion in a good way.
At this point I must share with you that I strongly encourage all photographers never to use an automatic setting on your camera. Use the AV setting instead and you will be much better served. The camera just doesn’t understand the best options for bird photography, and some or all of your photos will be compromised by automatic settings. You can think through the settings process better than the camera can, especially by using the simple settings I just suggested for you: Use an ISO of 400, an AV setting of f8, and the resulting shutter speed will be fast for bird photography under good sunlight conditions.
Beyond these three settings, though, keep in mind that it’s usually not worth spending time trying to photograph wild birds without good sunlight – unless you have no option. If you want to take a documentary photo, that’s always acceptable under any conditions, especially if a rare bird is your focus. If you want to practice taking photos in poor light on a cloudy period, by all means do it. But if you’re looking to take quality photos of birds with a telephoto or zoom lens, showing eye and feather detail and colors, you need to select photo periods graced by good sunlight when the sunlight comes from an angle, and your shadow points toward the bird or birds.
Beyond those simple suggestions, it will take some experience of your own to know what settings work best of you. But at least with my suggestions you’re not going into it blind. It can take months, even years, to figure out how to get started in this fashion if you don’t have some friendly advice from an experienced photographer. And by all means, visit with other bird photographers, read other information about bird photography, and learn from your experiences while photographing birds. One place to get a lot of action with your camera is at your feeding station. Practice there, and you’ll prosper from the experience when you go farther afield with your camera.
Then too, depending on whether you’re photographing in a woodland, on the edge of water – a marsh, lake, or beach – or with a blue sky background, you will learn what works best in your area, in your surroundings, and under different lighting conditions. With experience, you will become an ever-better judge of these variables, but we all still make mistakes and see improvements we can make. Bird photography is not an exact science, and we all try to make the best judgements we can and adapt as indicated. The primary import is not to be overwhelmed by the technical side of bird photography – and enjoy the process; it is so much fun and enjoyable!
One other option that is easy to set is your Frames per Second setting, which allows you to set your camera to take a single frame per second, or take a fast blast of photos – several per second, depending on your camera model. In the multiple frames per second mode, as long as you hold the shutter button down, photos will rattle off, which provides you with a series of images of a bird flying or taking off, or diving, or displaying. Then, once you have a series of photos, you can edit your favorite images from the series – after your birding outing. Even while in this multi-frame mode, if you don’t hold the shutter button down, your camera will just take a single photo as usual when you snap the shutter button once. This feature is a great one for bird photographers, and you can have a little extra fun when you press that shutter button; but you will quickly realize that the catch is being able to keep the moving bird within your viewfinder and photo frame.
As I described in last week’s article, bird photography adds to all our birding endeavors – in our yards, in the field, as we travel, and in our efforts to document our sightings and behavioral observations. It can also be a method of recording and remembering outdoor experiences, and your photos will aid in bringing fond memories back in vivid color. Bird photography is even an artistic endeavor that captures the real beauty, colors, and actions of wild birds in nature. There are also no limits to the enjoyment you experience when you engage in bird photography and grow with the experience.
Article and photographs by Paul Konrad
Share your bird photographs and birding experiences at editorstbw2@gmail.com