
The first two waves of warblers passed through during the previous three weeks, so this should be a good point to provide some information that will serve you well for the next warbler waves to come that will bring some exceptional species. The species composition of the first two waves were mostly predictable, dominated by Yellow-rumped Warblers, Orange-crowned, and Yellow Warblers – and lots of them, especially in the second wave last week. A few standouts among the big three of early warbler migrations were some Black-and-White Warblers, a pair of Nashville Warblers, and a feisty male American Redstart.
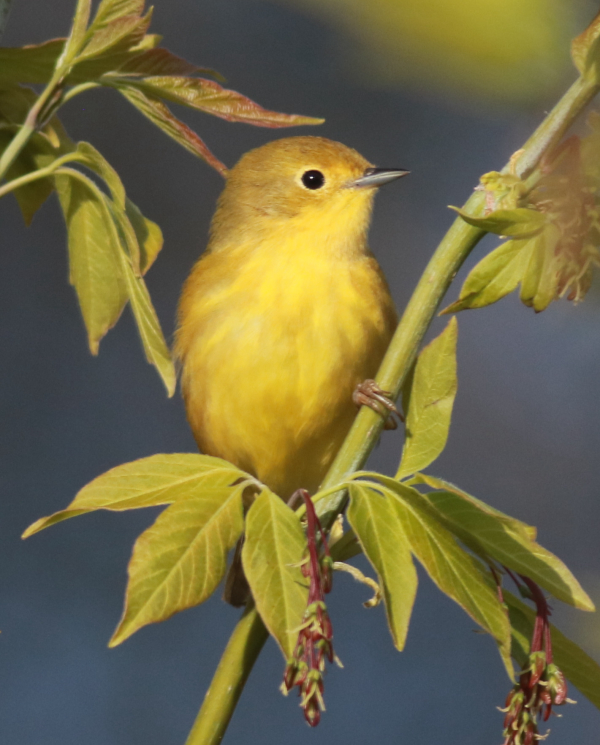
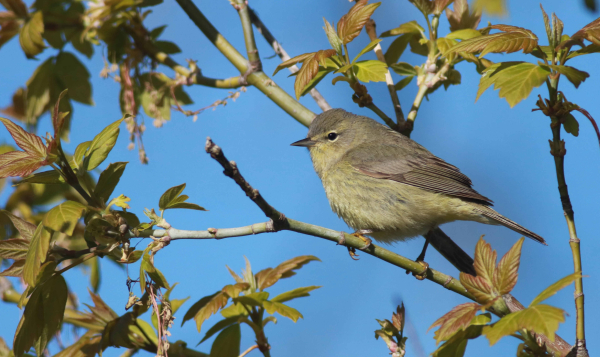
Capturing the essence of a small bird like this Yellow Warbler is more than a matter of luck. It was aided by choosing a pleasing natural setting with an open background at the right time of the day to utilize the best lighting.
|
My most memorable early warbler day was last Thursday, which provided a full day of fulfilling warbler photo action. That morning, with the sun shining after an overcast drizzly Wednesday, I hustled down to the Schoolhouse Grove, one of my three best migrant traps, hoping my expectation of an overnight fallout would hold true in spite of the strong west wind. It didn’t look good initially on the west end with the wind blowing off the adjacent lake, but I pressed farther into the grove than usual to a sheltered opening where warblers were very active!
Lots of Yellow-rumps, Orange-crowned, and Yellow Warblers were buzzing around the edges of the opening, but it got real when the first of several Black-and-White Warblers popped into view. It was fun to be reminded of their nuthatch-like movements along tree trunks and branches, sometimes even looking like Downy Woodpeckers in action, only much smaller. Actually, when I saw a Black-and-White Warbler next to a Yellow-rumped Warbler, the former looked to be half the size of the Yellow-rump.
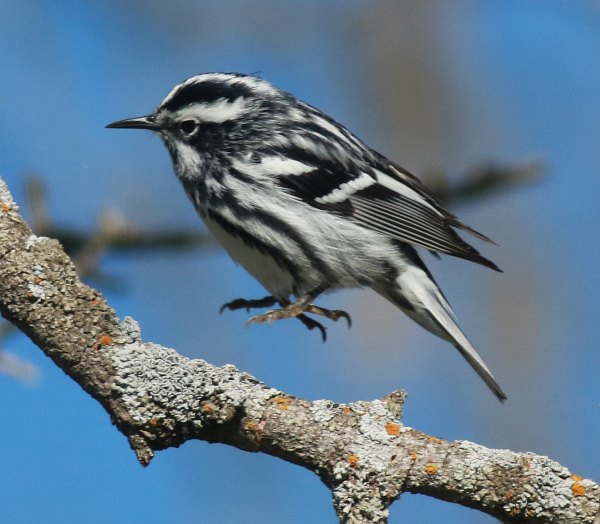
Warblers are small and fast, so following them and trying to record their activities brings your reaction timing to another level. It’s hard to anticipate a Black-and-White Warbler’s next move, or to try to focus on taking action photos of fast-moving warblers, but when you find a photo gem during your editing process, appreciate it for all its worth.
|
The first two Black-and-White Warblers provided some photo action on a gnarled maple tree, which I photographed from my usual mobile blind, my van. But thereafter I decided it was time to become a player, and entered the realm of the Black-and-Whites by following a number of them from tree to tree through the north side of the grove. My ground-oriented approach brought me in contact with many other warblers that seemed to be everywhere from ground level to the tree tops. My excitement with the Black-and-Whites is that I have seen so few of them, and have precious few photos, so they became the focus of my morning. Due to their quick nuthatchy movements, they are particularly hard to photograph, and it’s really tough to get pleasing photos of them.
I spent three hours in the grove as morning temperatures warmed, and with ever-poorer lighting conditions as the sun became ever higher in the sky, I decided to leave – and return when the sun was lower in the west. As I drove out, I stopped for a pair of “yellow warblers” gleaning insects less than a foot above the ground, and I tried for a photo. When the closer bird repositioned, I realized it was a Nashville Warbler – another species I’ve had precious few chances to photograph. I stretched around my window opening, focused on the birds as they perched on a dry grass stalk, and managed two photos before the pair flew. The first photo stands as my best for the species and included both the male and female in focus.
Redstart Fun
Before returning to my office, I swung by Melody’s Grove, just 200 yards away from home. This is usually my best migrant trap, especially later in May, but few songbirds have materialized there so far this spring. I scanned the bushes and trees with binoculars and saw a couple Yellow Warblers, a couple Yellow-rumps, and a Least Flycatcher, which made the site promising, but then I saw a bird I’ve been intently waiting for – a male American Redstart. I drove closer, but left my mobile blind behind to check my favorite area on foot, which was a rewarding choice.
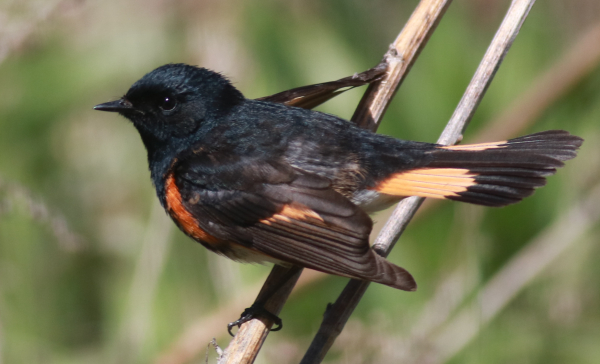
This photograph embodies a memorable time spent observing and photographing an active male American Redstart, that not only accepted the photographer, but interacted with him.
|
The redstart proved to be a willing participant in my photo interests and seemingly flew to meet me, perching just a few feet away on a plant stalk, spreading its tail and wings as though it was performing for me. Actually that may have had a level of truth considering there were no other American Redstarts in the area, perhaps in this part of the state.
By that time, the sun was quite high, so the fact that the wind was howling on the other side of the grove helped to keep the insects and warblers very low – at waist level or lower. That permitted me to photograph the redstart from above when it perched nearby between one and three feet above ground, which utilized the almost overhead sunlight best. I spent a half hour following the active male, which literally circled me at times, and he repeatedly flew within two or three feet of me and hovering a moment in pursuit of small flying insects.
Warbler Photography Variables
The above descriptions provide good examples of how you can adapt to conditions that may change with the weather, the wind, the landscape, the direction of the sunlight, the behavior of the birds, their feeding elevations, and more.
Find a Migrant Trap – A migrant trap is a location where migrating birds are funneled to a certain area that holds there attention with ample trees and bushes for them to forage during their short migration stopover. A migrant trap may be located along the side of a lake or wetland, the wooded edge of a rural farmstead, or a woody neighborhood adjoining an open area or park. Keep in mind that some days a migrant trap can be very active, and other says it will hold no warblers. I have three primary migrant traps that I check during May, and even during a given day, only one may attract warblers, so it’s worth checking trap number two if number one is slow.
You will usually encounter a movement of warblers northward with bird after bird passing by a select location. Some birds become a bit “territorial,” and stay in one location for a while to hawk flying insects or recirculate time and time again as they glean insects from branches and vegetation. During the morning it’s best to photograph at the east side of the trees and bushes at a given migrant trap, then switch to the other side during an evening outing, thereby using the best direction of the natural sunlight during prime photo times.
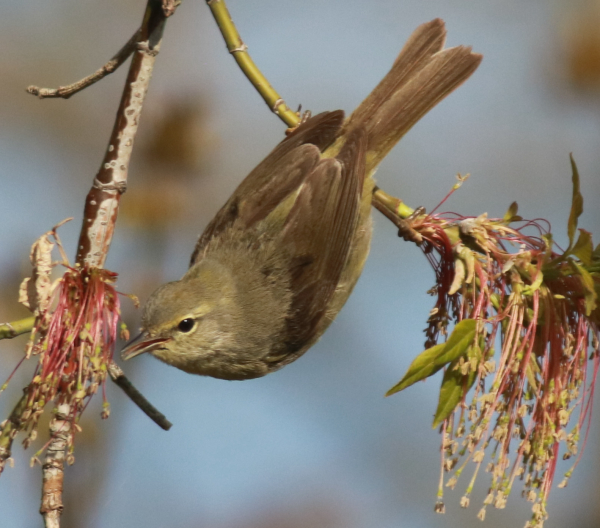
Note that the important elements of this photo are in focus – the Orange-crowned Warbler and the flowers of a boxelder tree – but the background is blurred out of focus by using an f6 aperture to narrow the depth of field.
|
Proximity – Because warblers are such small birds, we need to get as close as possible when trying to photograph them. I always prefer using my vehicle as a mobile blind. When parked with the engine turned off, birds tend to ignore it, and me inside of it. A vehicle also provides a level of comfort. Of course, you can’t always do a drive-in approach, so as noted above, you can always get out of the vehicle and walk slowly to try to position yourself for better photos of particular birds, and follow them if necessary. Some warblers may react to you by moving on, but that’s normal behavior too, and more warblers will command your attention pronto.
Positioning – One of the most important things you can do is to position yourself so the sun is at your back and your shadow is pointing at the warblers – simple enough. When photographing warblers, try to focus on birds that are active at eye level, although five feet higher or lower is usually within the prime photo realm. It’s best to avoid photographing birds that are far above you; look for another site if warblers are feeding in the treetops. As you spend a little time, you will notice areas that attract more warbler activity, so take advantage of these whenever possible. Such a location may have perches adjacent to locations where flying insects are active, but whatever the reason, spend some time in proximity to the location and you should be rewarded.
Background – Continuing with positioning in mind, things happen fast when photographing warblers, but try to be aware of the birds’ surroundings as you photograph, especially the background. You can improve your chances of having an unobstructed background, or a more pleasing background by initially positioning yourself in a location that will facilitate a simple background in your photo frame. Try to avoid a black background too, although if it’s unavoidable a black background can emphasize the warblers, and it beats a background obstructed by a mosaic of twigs.
One option is to “plant” a couple sticks to serve as warbler perches a few feet away from surrounding vegetation. Then take a couple photos of each perch, and view them in your camera monitor to see how the background looks in your photo frame– and what will be in focus and what won’t. Actually, taking a test photo is a good idea any time you’re trying to avoid a distracting background.
Area of Focus – If you can, try to keep some space between potential perches and vegetation behind them. Then, by using a small aperture, say f6, it should keep the birds in the area of focus, but it will throw the background out of focus. The greater the distance between the warbler and background elements, the better chance that the background will be out of focus, providing a pleasing light-green or tan background. It’s fine to have some leaves or even spring flowers on the branches, which can provide a pleasing setting for any warbler.
Fast Action – Warblers are usually moving fast through leaves and branches and other vegetation as they search for tiny insects and miniature spiders. Fast action also means you will need a fast shutter speed, but that should be provided automatically if you use of an f6 aperture setting. As I always suggest, set your Mode Dial on your camera to the Av setting that provides an aperture preference; you set your aperture (f-stop) and the camera will provide the corresponding shutter speed automatically, which should be more than adequately fast.
As the action heats up you will find yourself elevated to faster reaction time, and try to anticipate warblers’ next move. Be quick with your finger on the shutter button and take two photos any time you would normally take one to double your chances of getting a pleasing image. You will quickly find that warbler photography is not an exact science – with the birds moving so quickly, it’s tough to actually record the exact image you see and react to. If you do get a warbler that stays in a pleasing position for a few seconds, take advantage of it and take a handful of photos. At the same time, try to catch the action in some photos too. That can be even harder to do, but within the photos you take you may find a few surprises when you’re reviewing.
Good Lighting – Lighting makes or breaks a photo, so this section should really be the first in this list, but here we are: Keep the birds and your shadow in front of you, with the sun at your back. For best results, it’s best to limit your photo sessions to morning and evening hours, when the sun is between a 45-degree and 30-degree angle from the ground. Try to photograph on the east side of the grove of trees and bushes during the morning to take advantage of the light of the rising sun; take a break during midday when the sun is overhead; then return to the west side of the grove for the best light for a few hours before the sun sets.
Other Lighting Conditions – As it turned out, I was lucky the American Redstart chose low perches that I could use to my advantage to photograph it from above when the sun was mostly overhead angle. But what do you do when it’s cloudy and it’s the only day you have to photograph? As always, you make the most of it and see what you get under less than adequate lighting.
I photographed during overcast days a couple times in Ohio last May, and a couple days at Melody’s Grove a couple weeks later, and some images were quite pleasing. It helped a lot to increase the ISO to 800 to improve the light sensitivity under low light conditions. I wouldn’t increase the ISO beyond 800 to avoid very grainy images. Some photos may turn out just right, but most select photos will be a little under-exposed. In this case you can increase the “Brightness” using your photo editing software. That simple effort can really pay off.
Editing – The above variables and others necessitate two things: Taking lots of photos, and editing them. Editing in the sense of deleting all lesser photos, keeping the good and adequate photos for future reference; and separating the best of the best of each species, and each sex and age group to copy into your “keepers file.” The keepers will undoubtedly need a little more attention to make them the best they can be. This editing step will happen in your digital darkroom of your computer software for photo editing.
I try to minimize software editing to keep the essence of the original photo, but a minimum edit may include cropping extraneous background from the photo to emphasize the bird, and thereby enlarge it, which has the effect of zooming in on the warbler. While cropping, you can also reposition the warbler in the photo frame. I try to keep the bird off-center within the image; instead providing a bit more space in front of the bird than behind it. You can even turn a horizontal photo into a vertical image during the cropping process. With some photos you may be interested in doing a little more editing, perhaps to help “Sharpen” the image, or “Brighten” it. Editing is an enjoyable and creative part of the photography process.
Beyond Warblers
Of course, although this article was tailored for photographing warblers, you can use these techniques when photographing a variety of songbirds – and for other birds too. I hope you have already had some opportunities to photograph warblers and other songbirds that are northbound across North America. In that case this article might be even more helpful. I also hope you have already found a location where the migrants concentrate in peak numbers. Monitor the migrant traps regularly; it’s hard to predict which mornings the groves will be filled with songbirds. And be sure to set aside some time to take advantage of the migrants yet to come. Surely, there are a couple more weeks of songbird migration ahead, and the best photo opportunities are yet to come. Be prepared, be there, and enjoy this wonderful period in our birding year!
Article and photos by Paul Konrad
Share your bird photographs and birding experiences at editorstbw2@gmail.com